Classroom & live online1 course20 softwareVerifiable certificate
Building Information Modeling (BIM) Courses
Learn BIM Training Courses: Architects, engineers, and clients use building information modeling (BIM) software to collaborate on a building design before…
Professional
Building Information Modeling (BIM) courses
The enrollable courses of this field, level by level.
Professional Course1 course+
Professional Course in CAD Drafting & Documentation for BIM
120 Hours · 2 software
Chapter-wise syllabus of every software taught in this field -- tap a software to open it.
STAAD RCDC FE6 chapters · 29 topics+
Introduction to RCDC FEWhat RCDC FE does: design, detailing, drawings and reportsElements covered: flat slabs, plates, rafts, mats and combined foundationsFinite element results vs conventional slab designSupported design codes and project settingsWorkflow from analysis to drawings
Preparing the Analysis ModelPlate meshing for slabs and rafts in STAAD.ProSupports and soil springs for raft foundationsLoad cases and design load combinationsRunning the analysis and checking resultsSaving the model for RCDC FE
Importing Results and GeometryStarting an RCDC FE project from the analysis filePhysical geometry detection: slabs, columns, walls and openingsChecking and correcting detected geometrySelecting load combinations for design
Design Settings and Slab DesignConcrete grade, steel grade and clear coverBar diameter and spacing preferencesBasic mesh and additional reinforcementDesign moments from FE resultsDeflection and crack width checks
Raft, Mat and Punching Shear DesignRaft and mat foundation design checksSoil pressure reviewPunching shear around columnsDrops and column heads in flat slabsInteractive editing of reinforcement
Drawings, Reports and Project PracticeGenerating reinforcement drawingsExporting drawings to DXFDesign calculation reportsMaterial quantity detailsComplete flat slab and raft project
AutoCAD Professional (2D+3D)32 chapters · 217 topics+
2DAutoCAD 2D
13 chapters · 107 topics
Introduction to AutoCADIntroduction to AutoCAD HistoryExploring GUI (Graphical User Interface)Understanding the AutoCAD terminologyHow to install AutoCAD Student LicenseUnderstanding the AutoCAD Workspace
Understanding the File Management OperationsStarting a NEW AutoCAD File with NEW, QNew and STARTUPOpen existing Drawing fileSecure your file data with SAVE & SaveASUnderstanding the AutoSave optionSaving file in other versionUnderstanding the AutoCAD file formatQuiting AutoCAD- close,Exit/Quit
Basic OperationsWorking with MouseUnderstanding the Co-ordinate SystemWorking with Co-ordinate SystemUnderstanding object selection methodWorking with Drawing Setting- 1. Units 2. limits 3. Displaying GridUnderstanding the Drafting SettingLines- You Will Use Them EverywhereErase Unused objectsWorking With Entering CommandsUnderstanding the Undo & Redo Operations
Display Control commandsUnderstanding the Zoom CommandsUnderstanding the Zoom FactorUnderstanding the PAN & MBUTTONPANUnderstanding Regen & ViewresUnderstanding the Concept behind the Zoom
Drawing and Drafting toolsPolyline and their usesSpline and their usesUsing Different types of CircleUsing Different types of ArcUsing Rectangle in Depth lookUsing Ellipse (Center, Axis-End & Ellipticle Arc)Using Polygon in Depth lookUnderstanding the Construction line and Ray lineUnderstanding the Point and their stylesDivide – Measure –Not What You Would ThinkUnderstanding the Donut, Revision Cloud and Fill
Modify objects-Manipulation CommandsUnderstanding and Using Copy CommandUnderstanding and Using Move CommandDeleting duplicate objectsUnderstanding and Using Rotate CommandUnderstanding and Using Mirror CommandUnderstanding and Using Stretch CommandUnderstanding and Using Scale CommandUnderstanding and Using Offset CommandFillet object cornersChamfer object cornersTrimming and Extending linesUnderstanding Array CommandUsing Rectangular ArrayUsing Polar ArrayUsing Path ArrayModify Associative ArrayUnderstanding the Exploding ObjectsBreaking and Joining ObjectsWorking with Multi-function Grips
Creating Isometric DrawingsUnderstanding the Basic Concept of Isometric DrawingUnderstanding the Isometric SettingsUnderstanding the ISOPLANECreating ISO Circle and ISO lineUnderstanding the concept to Creating Isometric Views
Changing Objects PropertiesAssigning Object ColorUnderstanding the Line TypesAssigning Line TypesAssigning Object Line WeightChecking and Modifying Object PropertiesUnderstanding the Match Type Properties
Object visibilityHide – Isolate – End Isolation On Selected ObjectsTransparency – Old Thing Just Fade AwayLine Type Scale – Scale Size Is RelativeUnderstanding the Draw Order
Working with Text and tableUnderstanding Text Concept in AutoCADCreating and Modifiyig Text StyleCreating Single Line TextCreating Multiline TextModifying TextChecking SpellingUsing Mirror TextCreating & Modifying Table StyleCreating tableLinking Table to MSExcelEditing Table
Hatch and GradientUnderstanding Hatching conceptCreating Basic HatchesHatching in Depth lookUsing GradientMirror Hatch
DimensioningUnderstanding Dimensioning conceptUsing Basic Dimensions (Linear, Aligned, Arc Length, Ordinate, Radius, Diameter, Jogged and Angular)Understanding and Using Continue & Baseline dimensionsAdding tolerance Dimensions in the ObjectAdding Center markCreating and Modifying Dimension style in Depth LookUsing the Dimension Edit and Dimension Text EditUnderstanding and Using leader DimensionUnderstanding and Using Mltileader DimensionUnderstanding and Using Mltileader Style Dimension
Understanding the Model Space, Paper or Layout Space and PlottingWhat is the Difference Between Printing and Plotting?Under Drawing Spaces (Model Space & Paper Space)Using Page setup for LayoutMaking and clipping viewportsAdding Layout with Title BlockInserting Title Block on LayoutAdding Annotation on a LayoutPrinting or Plotting from Model space and Paper SpaceUnderstanding Plotstyle
PTAutoCAD PT
12 chapters · 58 topics
Working with Block and WblockCreate & Insert BlockCreate WBlockCreate Wblock using BaseEdit, Save & Save As Block
Working with Attribute BlocksDefining Attribute BlockBlock Attribute ManagerModifying Block Attribute Definitions
Creating Parametric DrawingUnderstanding Parametric Drawing and ConstraintsApplying Geometric constraintsApplying Dimensional constraintsHide/Show and Delete ConstraintsConverting Dimensions into Dimensional ConstraintsChanging Dimensional Constraints using Grip Editing
Working with Dynamic block
Utilities & Inquiry ToolsUsing ID PointUsing List CommandUsing Measuregeom command(Distance, Radius, Angle, Area & Volume)
Working with Clipboard ToolsUsing Cut, Copy and Copy with Base PointUsing Paste ClipUsing Paste As BlockUsing Copy Link and Paste original Co-ordinateUsing Paste SpecialUsing Hyperlink & Paste Hyperlink
Using Layer ManagementUnderstanding Layer in AutoCADCreating and Editing LayersAssigning New Layers in Existing ObjectUsing Layers to Plot ControlFreeze Or Thaw, On Or Off And Locking LayersHow to Save Layers ?Opening Save Layer in Existing Drawings
OLE (Object Linking Embedding) conceptUnderstanding OLE ConceptLinking & Embedding Object into AutoCADLinking Data using Paste LinkUsing OLE LinksOpening OLE Source and Using OLE ScaleUsing OLE Hide & OLE FrameUsing OLE Quality & OLE Startup
Working with Existing DrawingUnderstanding external referencesAttaching External ReferencesEditing External References objectUsing external references Palettes
Sliding & ScriptingCreating and Saving SlidesOpening and using slidesCreating Script fileRunning Script fileCreating a Simple Project using with Script
Working with Annotative ScalingUnderstanding Annotation ScalingAdding Hatch with AnnotativeAdding Dim with AnnotativeAdding Text with AnnotativeAdding MLeader with AnnotativeAdding Block with Annotative
Advance OperationsUsing Design Center PalettesUsing Tool PalettesUnderstanding & Using QSELECTSelect Similar – Pick It OnceAdd Select - Start a Command when you don't have toRenaming objectsUsing Quick Calculator
3DAutoCAD 3D
7 chapters · 52 topics
Getting Started with 3D ModelingIntroduction to AutoCAD 3D interfaceSetup 3D WorkspaceUnderstanding the View Cube and Orbit ToolsUnderstanding the 3D Object SnapUnderstanding the Visual StylesUnderstanding Allow/ Disallow Dynamic UCSManipulating the User Co-ordinate SystemUnderstanding Viewport Configuration
Creating Solid 3D Objectsworking with Solid Primitives
Creating 3D Objects from 2D ProfilesUnderstanding the 2D Profiles and its worksUsing the Extrude CommandUsing the Revolve commandUsing the Loft CommandUsing the Sweep commandUsing the Polysolid CommandUsing the Press-pull Command
Working with Meshing ToolsControlling mesh primitive optionUsing Revolved Mesh, Edge Mesh, Ruled Mesh & Tabulated MeshSmoothing Mesh with Smooth Object, Smooth More, Smooth Less & Refining MeshUsing Adding/Removing a Crease and Controlling mesh Tessellation option commandUsing Extruding, splitting and Merging mesh faces CommandUsing Creating & Closing a Hole in a Mesh, Collapsing a Face/Edge and Spinning a Triangle Face CommandUsing Converting a Mesh to a Solid and Surface CommandConverting 3D Object in to a Mesh
Modifying 3D ObjectsUsing Gizmo Command- Move, Rotate and ScaleUsing object CullingMirroring and Aligning object in 3DMirroring and Aligning object in 3DCreating a Composite Solid- Using Boollion Operation: Union, Substract and IntersectAdding a Chamfer/ Chamfer Edge and Fillet/ Fillet EdgeEditing Edges of a Solid - Extracting, Imprinting, Coloring and Copying EdgesEditing Faces of a Solid- Extruding, Tapering, Moving/Offsetting, Copying, Deleting, Rotating and Coloring facesEditing Entire Solid- Separating and Shelling SolidsChecking Solids for Interference, Slicing Solids and Thickening SurfaceCreating a Curve using Offsetting EdgesAdding Automatic 2D Profile Views From 3D Solid View
Working with Surface ToolsCreating a Surface with Network, Lofted, Swept, Planer, Extruded and Revolved Surface CommandCreating a Blend, Patch and Offset SurfaceConverting a Surface into a Nurbs SurfaceEditing Control Vertices on a Nurbs SurfaceDisplaying and Hiding Control Vertices on Nurbs SurfaceRebuilding, Adding and Removing Control VerticesProjecting curves on to a Surface
Rendering and presentationAssigning Material to 3D ObjectModifying Material PropertiesAdding Sun, Geolocation, date and timeAdding Lights-Point, Spot, Web and Distance lightModifying Light Properties using with Light listAdding environment- Display, Sky background and ShadowCreating and Modifying Camera ViewCreating Named ViewCreating and Saving renderings as image file
Getting Started With AutoCAD MEPIntroduction & Starting AutoCAD MEPUnderstanding AutoCAD MEP Interface & WorkspacesUnderstanding the Project BrowserUnderstanding the Project NavigatorReviewing the Project Tab of Project NavigatorReviewing the Constructs Tab of Project NavigatorReviewing the Views Tab and Sheets Tab of Project NavigatorAdding Categories in Project NavigatorCreating and Modifying Constructs in Project NavigatorUnderstanding and Adding Client Drawings as Elements with Project NavigatorAdding Views in Project NavigatorAdding and Creating Section and Elevation Views in Project NavigatorCreating Sheets and Adding Views to Sheets in Project NavigatorUsing the Repath Project Command in Project Navigator
Controlling AutoCAD MEP OperationsCustomizing and Using AutoCAD MEP SnapsCustomizing and Using MEP CompassUnderstanding the Display ConfigurationsUnderstanding the Display ManagerUnderstanding More About Option Settings for AutoCADMEP UsersControlling Tab and Panel Visibility on the Ribbon
Schematic DrawingsUnderstanding About Schematic DiagramsCreating a Schematic View DrawingCreating Schematic SystemsAdding Schematic Lines in Orthographic/Isometric ModeAdding Schematic Symbols in Orthographic/Isometric ModeAdding Schematic Lines Using GripsCreating a Schematic Line from an AutoCAD Line, Arc, or PolylineModifying Schematic Line /Symbols Styles and PrioritiesModifying Schematic Line and Symbols
MEP Designing with Space and Zone ObjectsUnderstanding Spaces and ZonesGenerating SpacesUnderstanding Space Properties and Engineering DataAdding ZonesExporting and Importing Space Engineering DataSetting Space HatchingModifying SpacesAdding Ceiling Grids to SpacesAdding Holes to a Ceiling Grid
Drawing HVAC SystemsUnderstanding HVAC System Workflow
Revit FundamentalsIntroduction to RevitUnderstanding About Parametric Modeling RelationshipsUnderstanding The Revit ElementsUnderstanding Elements Properties Behavior in RevitOpening a Project FileIdentifying the User Interface ComponentsWorking with the mouse and keyboardWorking With Different Project View Windows, Zooming/Navigation Project ViewsUnderstanding Ways to Select ObjectsUsing Visualization Aids When Working in 3D ViewsSaving and Closing Project File
Getting Started With Revit ArchitectureStarting a New ProjectSpecify Project InformationUnderstanding the Units and SnapsCreating and Modifying LevelsSetting and Showing the Active Work PlaneCreating Reference Planes
Modeling Building EssentialsCreating Basic WallsCreating DoorsCreating WindowsUsing & Modifying Temporary DimensionsCreating Curtain WallsCreating Curtain Grids and MullionsCreating a Roof by FootprintCreating a Roof by Extrusion
Basic Modifying and Reporting toolsCopying and Moving ObjectsRotating & Scaling ObjectsCreating Linear & Radial ArraysMirroring & Aligning ObjectsTrimming and Extending ObjectsOffsetting ObjectsCreating Elements Consistently with Match Type Properties and Create SimilarMeasuring versus Dimensioning ObjectsPinning, Splitting & Deleting ObjectsUnderstanding Element IDs
Walls - An In-Depth LookCreating Walls by Picking LinesUnderstanding Wall PropertiesUnderstanding Curtain Wall TypesCustomizing Vertical Wall Structure by Adding Sweeps & RevealsCreating a Stacked WallUnderstanding Compound WallCreating a Curved Curtain WallSelecting Curtain Wall ComponentsWorking with Curtain Wall Grids & MullionsModifying Curtain Wall PanelsPlacing Doors in Curtain WallsCustomizing Vertical Wall with Edit Wall ProfilesCustomizing the Base and Top Extension of Walls
Modelling Building Core ElementsCreating FloorsModifying Floor PropertiesCreating Stairs by ComponentCreating Stair Components by SketchingCreating Spiral, L-Shape & U-Shape Winder StairCreating RampsPlacing Railings on a HostCreating Railings by SketchCreating and modifying GridsCreating Architectural Column In-Depth-LookUnderstanding & Customizing Railing Properties
Modelling Building InteriorsCreating Interior PartitionsCreating CeilingsCreating Ceiling OpeningsPlacing Building Components in CeilingsCreating Rooms & Room Separation LinesPlace Rooms Automatically & Tag RoomCreating Area Plans & Area Boundary LinesCreating and Managing Color SchemesControl the Visibility of Rooms
Dimensions and ConstraintsCreating Permanent Dimensions: Aligned, Linear, Angular, Radial, Diameter & Arc LengthWorking with Permanent DimensionsWorking With Spot Elevation, Coordinates & SlopesModifying DimensionsOverriding Dimension Text & Locking DimensionsControlling Dimension Units & Using Equality ConstraintCreating & Modifying Dimension StylesDimensioning Entire Walls & Change Dimensions from Temporary to PermanentChange the Appearance & Show Temporary Dimensions with Multiple Elements Selected
Components and FamiliesHow to Download ComponentsUnderstanding FamiliesPlacing ComponentsPlacing Hosted ComponentsPlacing Components from the Project BrowserLoading Families and Using Type
CatalogsMove a Component to a Different Host
Managing Project Settings & Visibility/GraphicsCreating/Modifying/Using New/Custom Drafting Fill PatternCreating/Modifying/Using New/Custom Model Fill PatternCreating/Modifying/Using New/Exist MaterialCreating New Material LibraryCreating/Modifying/Using Line StyleCreating/Modifying Line Weight & Line PatternCreating/Modifying Object Styles with Using Line Weight/Line PatternUnderstanding & Using Detail LevelElements: Hide/Unhide & Temporarily Hide/IsolateUnderstanding & Controlling Visibility and GraphicOverride Visibility and Graphic Display of an ElementsUnderstanding & Creating View Filters using AND, OR & Nested Rule Sets
Advanced Modeling Tools & TechniquesCreating Roof Soffit, Fascia & GutterCut an Opening in a Floor, Roof, or CeilingCreating Rectangular Opening in a Wall & Shaft OpeningPlacing a Model Line & Converting Line TypesAdding & Editing Model TextJoining Roofs & Creating a Dormer Opening in a RoofSplitting the Face of an Element & Using material as paintCutting and Joining Model Elements
Schedules/Quantities and Material TakeoffsCreating Schedule By: Fields, Filter, Sorting/Grouping, Formating & AppearanceAdding New Parameter to a ScheduleModify a Schedule By: Parameter, Column, Row, Title & Header & AppearanceAdding an Annotation ScheduleWorking With Key ScheduleWorking With Room and Area SchedulesCreating Material Takeoff Schedules
Annotation (Text Notes, Keynotes, Tags & Symbols.)Adding Text Note, Check Spelling, Find/Replace & Modifying Text PropertiesUsing Keynotes (Element/Material/User) and Keynotes SettingCreating Keynote LegendsUsing Tag By Category & Tag AllUsing Material Tag & Sequential Room/Door/Window TagsEditing Tag & Tag FamilyAdding Symbol & Creating New Symbol
Views and SheetsCreating Plan Views: Floor/Reflected Ceiling/StructuralUnderstanding Plan Region, View Range, Cut Plan View & UnderlayCreating Elevation Views: Building, Interior, Framing & ReferenceCreating Section, Callout & Reference section/Callout ViewSheet Views: Add a Sheet, Add Views to a Sheet, Use Guide Grids & Using Many More...Understanding & Using Crop Region/Annotation Crop RegionComplete: Creating/Modifying a Title BlockUnderstanding & Creating/Applying a Viewport Type/View TitleWorking With Placing Schedules on SheetsUnderstanding & Creating a Sheet ListUsing Revision Cloud & Sheet Issues/Revisions
Drafting, Detailing, Legend & Managing Other VIewsCreate a Drafting View & Inserting/Importing/Saving Drafting ViewWork with Detail Line, Detail Component, Repeating Details & InsulationWork with Filled Regions & Masking RegionsCreating a Legend View & Adding Legend ComponentsCreating/Modifying View TypesCreating Duplicate Views: Duplicate/As Dependent/with Detailing
Construction Modeling WorkflowsCreating & Modifying PartsControlling the Visibility and Appearance of PartsDividing Parts With SketchingDividing Parts With ReferencesDividing Parts with Gaps and ProfilesCreating and Using Division Profile FamilyWorking with Merging and Excluding PartsScheduling PartsUnderstanding Wall Joins and PartsCreating and Dividing Parts from Linked ModelsCreating an AssemblyPlacing and Modifying AssemblyCreating and Modifying Assembly ViewsDeleting Assembly Views
Site DesignCreating a Toposurface Using Points/CAD File/Point FileUsing Building PAD, Subregions and Split/Merging SurfacesUsing Property Line & Graded RegionCreating Contour Labels & Managing Site SettingAdd Parking and Site ComponentsUnderstanding Project North , True North & Rotating True NorthSpecifying The Location, Weather and SiteEnabling Sun Path Diagram & Creating Solar Study
Creating Conceptual Design ProjectOpening & Understanding the Conceptual Design EnvironmentCreating Conceptual Mass Solid Forms, Void Forms & SurfaceCreating Reference Planes and Reference LinesUnderstanding Creating Forms from Model Lines & Reference LinesWorking With Reference PointsDifferent way to Modifying form profilesModifying Forms with Add Edge and Add ProfileCreating Divided Paths, Surfaces & Adding Patterns to Divided SurfacesCreating Dimension and Parameter Constraints & Loading Mass into the Project EnvironmentCreating an In-Place Mass in Revit EnvironmentCreating Mass FloorsCreating Model by Face Elements: Wall, Floor, Roof & Curtain System
Managing SettingsManaging & Creating Project Browser View OrganizationTransfer Project StandardsUnderstanding Project Template FilesCreating Own Template FilesDeleting Unused Items from a ProjectAdding/Removing Keyboard ShortcutsUsing the Options Dialog
Working in a TeamUnderstanding Worksharing ConceptsUnderstanding Worksharing TerminologyEnabling Worksharing and Creating Central ModelCreating a Local Copy of a Central ModelCreating Worksets and Making Worksets EditableControlling the Workset VisibilityHow to Communicate and Transferring Changes Between Local Model to Central MOdelWorking With Editing RequestUnderstanding the Active WorksetsWorking with Worksharing Display ModesUnderstanding the Opening Worksets
Working With Groups, Design Options & Project PhasingUnderstanding the Group ElementsCreating a Detail and a Model GroupsAttaching a Detail GroupModifying Group ElementsLoad and Place GroupsConverting Groups to Linked Models and Linked Models to GroupsSaving and Deleting GroupsUnderstanding Phase and Phase FiltersCreating a Phase and Combining PhasesDemolish Elements toolCreating and Applying a Phase FiltersUnderstanding Design OptionsWorking with Design Options and Option SetsDuplicating, Deleting & Editing Design OptionsPromoting and Accepting Design Options
Working With Family CreationIntroducing Form CreationCreating Solid Extrusions and BlendsCreating Solid Revolves, Solid Sweeps and Swept BlendsCreating Void Forms, Reference Planes and Reference LinesCreating Dimension, Parameter Constraints & Family Types
Presentation ViewsWorking with Levels in 3D ViewsCreating and Rotating 3D ViewsCreate a Perspective View & Uncropped Perspective ViewsWork in a 3D View & Perspective ViewsWorking with a Section BoxIsolate Elements in a 3D View with a Selection BoxSpecify the Background for a 3D View & Save a 3D View Orientation as a Project ViewWorking with Displacement Set/ViewsCreating a Decals & Managing Decals TypesManaging The Shadows & Photographic ExposureUtilizing Depth CueingOrienting 3D Views to Other Views
Rendering and WalkthroughsIntroducing Rendering WorkflowUnderstanding the Rendering Quality Settings & Test RenderPreparing a View for Best Rendering PerformanceUnderstanding the Rendering Output SettingsUsing Lighting Fixtures for RenderingCreating New Lighting FixturesUsing an IES File for a Light SourceApplying a Lighting Scheme for a RenderingManaging Lighting Fixtures for RenderingDefining the Sun Settings for a RenderingUnderstanding & Defining the Rendering BackgroundAdding Plants and Entourage to the SceneCreating a Rendered ImageUnderstanding Exposure ControlsSaving and Displaying Renderings in the ProjectCreating a Walkthrough PathEditing a Walkthrough Path & FramesControlling Walkthrough PlaybackExporting a Walkthrough
Leveraging Other FilesImporting and Managing Image FilesLinking and Importing CAD FilesManaging Linked/Imported CAD FilesUsing CAD Files to Create Building ModelUnderstanding CAD Export Setup OptionsExporting to 2D/3D CAD FormatsExporting Views to Image FilesExporting Model to 3ds MaxExporting Room and Area ReportsExporting schedulesExporting to Civil 3D
Revit FundamentalsIntroduction to RevitGet the Revit softwareIdentifying the User Interface ComponentsOpening a Project FileWorking with the mouse and keyboardWorking With Different Project View Windows, Zooming/Navigation Project ViewsUsing Visualization Aids When Working in 3D ViewsSaving and Closing Project FileUnderstanding About Parametric Modeling RelationshipsUnderstanding The Revit ElementsUnderstanding Elements Properties Behavior in Revit
Getting Started With Revit ArchitectureStarting a New ProjectSpecify Project InformationUnderstanding the Units and SnapsCreating and Modifying LevelsUnderstanding the Work Planes & Creating Reference PlanesSetting and Showing the Active Work Plane
Sketching ElementsWorking with Listening DimensionsUnderstanding the Sketching Terminology and ElementSketch a Line, Rectangle and CircleSketch an Inscribed and Circumscribed PolygonSketch a Start-End-Radius, Center-Ends and Tangent ArcsSketching a Fillet ArcSketching Ellipses in RevitSketching Splines in RevitClosing an Open LoopModifying Sketched Elements
Modeling Building EssentialsCreating Basic WallsCreating DoorsCreating WindowsUsing & Modifying Temporary DimensionsCreating Curtain WallsUnderstanding & Creating the Curtain Panel, Grids and MullionsCreating a Roof by FootprintCreating a Roof by Extrusion
Working with Selection Method in RevitUnderstanding Ways to Select Revit ElementsSelecting Elements with Polygon MethodSelecting Family Type ElementsDetermining How Many Elements Are SelectedSelecting Revit Elements Using a FilterSelecting Chain Elements in RevitSelecting Part of a Chain in RevitSelecting Joined Elements at a PointUnderstanding and Selecting an Element with/without the Element IDSelecting Multiple ElementsRestore a Selection and Removing Elements from a Selection
Basic Modifying and Reporting toolsCopying and Pasting Revit Elements In-Depth-LookRotating and Aligning Revit ElementCreating Arrays of Elements in RevitMirroring and Flip Elements in RevitTrimming and Extending Elements in RevitOffsetting Revit ElementsCreating Elements Consistently with Match Type Properties and Create SimilarPinning, Splitting and Deleting Revit ElementsUndo, Redo, Cancel an Action and Repeating the Last CommandMoving Revit Elements In-Depth-LookResizing Elements in Revit
Families and ComponentsUnderstanding the Families in RevitUnderstanding and Loading System Family TypesPlacing Elements/Families/Components from the Project BrowserComponents and Placing Components/ Hosted Components in ContextLoading Families and Setting the Default Family Library LocationLoading Autodesk FamilyLoading a Family with a Type CatalogOpening the Family/ Family EditorLoading the Current Family and Reloading a Family into a ProjectHow to Download Revit Families/ ComponentsMoving family/Component to a Different Host
Annotation Part - I (Dimensions)Creating Permanent Dimensions: Aligned, Linear, Angular, Radial, Diameter & Arc LengthWorking with Permanent DimensionsWorking With Spot Elevation, Coordinates & SlopesModifying DimensionsOverriding Dimension Text & Locking DimensionsControlling Dimension Units & Using Equality ConstraintCreating & Modifying Dimension StylesDimensioning Entire Walls & Change Dimensions from Temporary to PermanentChange the Appearance & Show Temporary Dimensions with Multiple Elements Selected
Annotation Part - II (Text Notes, Keynotes, Tags & Symbols.)Adding Text Note, Check Spelling, Find/Replace & Modifying Text PropertiesUsing Keynotes (Element/Material/User) and Keynotes SettingCreating Keynote LegendsUsing Tag By Category & Tag AllUsing Material Tag & Sequential Room/Door/Window TagsEditing Tag & Tag FamilyAdding Symbol & Creating New Symbol
Walls - An In-Depth LookCreating Walls by Picking LinesUnderstanding Wall PropertiesUnderstanding Curtain Wall TypesCreating a Curved Curtain WallSelecting Curtain Wall ComponentsWorking with Curtain Wall Grids & MullionsModifying Curtain Wall PanelsPlacing Doors in Curtain WallsCreating a Stacked WallUnderstanding Compound WallCustomizing Vertical Wall Structure by Adding Sweeps & RevealsCustomizing Vertical Wall with Edit Wall ProfilesCustomizing the Base and Top Extension of Walls
Modelling Building Core ElementsUnderstanding and Creating a FloorUnderstanding and Modifying Floor & Roof PropertiesEditing Floor and Roof ShapeUnderstanding the Stair and Stair ComponentsCreating Stairs by ComponentCreating Spiral, L-Shape & U-Shape Winder StairCreating and Modifying Stair by SketchingCreating a Landing ComponentModify the Individual Components of the StairCreating and Modifying Multistory StairUnderstanding and Modifying the Stair PropertiesVideos: Working with Stairs in RevitUnderstanding and Creating/Editing a RampUnderstanding and Modifying the Ramp PropertiesUnderstanding and Creating Railings by SketchUnderstanding & Customizing Railing PropertiesPlacing Railings on a HostCreating and modifying GridsCreating Architectural Column In-Depth-Look
Modelling Building InteriorsCreating Interior PartitionsCreating CeilingsCreating Ceiling OpeningsPlacing Building Components in CeilingsCreating Rooms & Room Separation LinesPlace Rooms Automatically & Tag RoomCreating Area Plans & Area Boundary LinesCreating and Managing Color SchemesControl the Visibility of Rooms
Views and SheetsCreating Plan Views: Floor/Reflected Ceiling/StructuralUnderstanding Plan Region, View Range, Cut Plan View & UnderlayCreating Elevation Views: Building, Interior, Framing & ReferenceCreating Section, Callout & Reference section/Callout ViewSheet Views: Add a Sheet, Add Views to a Sheet, Use Guide Grids & Using Many More...Complete: Creating/Modifying a Title BlockUnderstanding & Creating/Applying a Viewport Type/View TitleWorking With Placing Schedules on SheetsUnderstanding & Creating a Sheet ListUsing Revision Cloud & Sheet Issues/RevisionsUnderstanding & Using Crop Region/Annotation Crop Region
Schedules/Quantities and Material TakeoffsCreating Schedule By: Fields, Filter, Sorting/Grouping, Formating & AppearanceAdding New Parameter to a ScheduleModify a Schedule By: Parameter, Column, Row, Title & Header & AppearanceWorking With Key ScheduleWorking With Room and Area SchedulesCreating Material Takeoff Schedules
Advanced Modeling Tools & TechniquesCreating Roof Soffit, Fascia & GutterCut an Opening in a Floor, Roof, or CeilingCreating Rectangular Opening in a Wall & Shaft OpeningPlacing a Model Line & Converting Line TypesAdding & Editing Model TextJoining Roofs & Creating a Dormer Opening in a RoofSplitting the Face of an Element & Using material as paintCutting and Joining Model Elements
Construction Modeling WorkflowsCreating & Modifying PartsControlling the Visibility and Appearance of PartsDividing Parts With SketchingDividing Parts With ReferencesDividing Parts with Gaps and ProfilesCreating and Using Division Profile FamilyWorking with Merging and Excluding PartsScheduling PartsUnderstanding Wall Joins and PartsCreating and Dividing Parts from Linked ModelsCreating an AssemblyPlacing and Modifying AssemblyCreating and Modifying Assembly ViewsDeleting Assembly Views
Drafting, Detailing, Legend & Managing Other VIewsCreate a Drafting View & Inserting/Importing/Saving Drafting ViewWork with Detail Line, Detail Component, Repeating Details & InsulationWork with Filled Regions & Masking RegionsCreating a Legend View & Adding Legend ComponentsCreating/Modifying View TypesCreating Duplicate Views: Duplicate/As Dependent/with Detailing
Managing Project Settings & Visibility/GraphicsCreating/Modifying/Using New/Custom Drafting Fill PatternCreating/Modifying/Using New/Custom Model Fill PatternCreating/Modifying/Using New/Exist MaterialCreating New Material LibraryCreating/Modifying/Using Line StyleCreating/Modifying Line Weight & Line PatternCreating/Modifying Object Styles with Using Line Weight/Line PatternUnderstanding & Using Detail LevelElements: Hide/Unhide & Temporarily Hide/IsolateUnderstanding & Controlling Visibility and GraphicOverride Visibility and Graphic Display of an ElementsUnderstanding & Creating View Filters using AND, OR & Nested Rule Sets
Site DesignCreating a Toposurface Using Points/CAD File/Point FileUsing Building PAD, Subregions and Split/Merging SurfacesUsing Property Line & Graded RegionCreating Contour Labels & Managing Site SettingAdd Parking and Site ComponentsUnderstanding Project North , True North & Rotating True NorthSpecifying The Location, Weather and SiteEnabling Sun Path Diagram & Creating Solar Study
Creating Conceptual Design ProjectOpening & Understanding the Conceptual Design EnvironmentCreating Conceptual Mass Solid Forms, Void Forms & SurfaceCreating Reference Planes and Reference LinesUnderstanding Creating Forms from Model Lines & Reference LinesWorking With Reference PointsDifferent way to Modifying form profilesModifying Forms with Add Edge and Add ProfileCreating Divided Paths, Surfaces & Adding Patterns to Divided SurfacesCreating Dimension and Parameter Constraints & Loading Mass into the Project EnvironmentCreating an In-Place Mass in Revit EnvironmentCreating Mass FloorsCreating Model by Face Elements: Wall, Floor, Roof & Curtain System
Working With Groups, Design Options & Project PhasingUnderstanding the Group ElementsCreating a Detail and a Model GroupsAttaching a Detail GroupModifying Group ElementsLoad and Place GroupsConverting Groups to Linked Models and Linked Models to GroupsSaving and Deleting GroupsUnderstanding Phase and Phase FiltersCreating a Phase and Combining PhasesDemolish Elements toolCreating and Applying a Phase FiltersUnderstanding Design OptionsWorking with Design Options and Option SetsDuplicating, Deleting & Editing Design OptionsPromoting and Accepting Design Options
Working With Family CreationIntroducing Form CreationCreating Solid Extrusions and BlendsCreating Solid Revolves, Solid Sweeps and Swept BlendsCreating Void Forms, Reference Planes and Reference LinesCreating Dimension, Parameter Constraints & Family Types
Managing SettingsManaging & Creating Project Browser View OrganizationTransfer Project StandardsUnderstanding Project Template FilesCreating Own Template FilesDeleting Unused Items from a ProjectAdding/Removing Keyboard ShortcutsUsing the Options Dialog
Presentation ViewsWorking with Levels in 3D ViewsCreating and Rotating 3D ViewsCreate a Perspective View & Uncropped Perspective ViewsWork in a 3D View & Perspective ViewsWorking with a Section BoxIsolate Elements in a 3D View with a Selection BoxSpecify the Background for a 3D View & Save a 3D View Orientation as a Project ViewWorking with Displacement Set/ViewsCreating a Decals & Managing Decals TypesManaging The Shadows & Photographic ExposureUtilizing Depth CueingOrienting 3D Views to Other Views
Rendering and WalkthroughsIntroducing Rendering WorkflowUnderstanding the Rendering Quality Settings & Test RenderPreparing a View for Best Rendering PerformanceUnderstanding the Rendering Output SettingsUsing Lighting Fixtures for RenderingCreating New Lighting FixturesUsing an IES File for a Light SourceApplying a Lighting Scheme for a RenderingManaging Lighting Fixtures for RenderingDefining the Sun Settings for a RenderingUnderstanding & Defining the Rendering BackgroundAdding Plants and Entourage to the SceneCreating a Rendered ImageUnderstanding Exposure ControlsSaving and Displaying Renderings in the ProjectCreating a Walkthrough PathEditing a Walkthrough Path & FramesControlling Walkthrough PlaybackExporting a Walkthrough
Leveraging Other FilesImporting and Managing Image FilesLinking and Importing CAD FilesManaging Linked/Imported CAD FilesUsing CAD Files to Create Building ModelUnderstanding CAD Export Setup OptionsExporting to 2D/3D CAD FormatsExporting Views to Image FilesExporting Model to 3ds MaxExporting Room and Area ReportsExporting schedulesExporting to Civil 3D
Revit Structure Basics and Project SetupBIM for structural engineersRevit interface, Project Browser and PropertiesStructural templatesLevels, grids and reference planesLinking an architectural model and copy/monitor
Columns and Structural WallsStructural column families and typesPlacing columns at gridsSlanted columnsStructural walls and wall openingsEditing column and wall properties
FoundationsIsolated footingsWall foundationsFoundation slabs and thickened edgesPile caps basicsStep footings and elevations of foundations
Beams, Bracing and TrussesBeam families and placementBeam systemsCross bracingTrussesBeam justification and cut-backsSteel connections overview
Floors, Shafts and OpeningsStructural floors and slab edgesSloped slabs and span directionShaft openingsOpenings by face and vertical openingsStairs and ramps coordination
ReinforcementRebar cover settingsPlacing rebar in beams, columns and footingsRebar shapes and hooksArea reinforcement and path reinforcementRebar sets and visibilityRebar schedules
Analytical Model and LoadsPhysical and analytical modelBoundary conditionsLoad cases and load combinationsPoint, line and area loadsExchanging the model with analysis software
Documentation and ProjectFraming plans and foundation plansSections, details and calloutsStructural tags and schedulesSheets and title blocksFinal project: RCC building model to drawing set
Revit FundamentalsIntroduction to RevitUnderstanding About Parametric Modeling RelationshipsUnderstanding The Revit ElementsUnderstanding Elements Properties Behavior in RevitOpening a Project FileIdentifying the User Interface ComponentsWorking with the mouse and keyboardWorking With Different Project View Windows, Zooming/Navigation Project ViewsUsing Visualization Aids When Working in 3D ViewsSaving and Closing Project FileGet the Revit software
Getting Started With Revit ArchitectureStarting a New ProjectSpecify Project InformationUnderstanding the Units and SnapsCreating and Modifying LevelsSetting and Showing the Active Work PlaneUnderstanding the Work Planes & Creating Reference Planes
Basic Modifying and Reporting toolsCopying and Pasting Revit Elements In-Depth-LookRotating and Aligning Revit ElementCreating Arrays of Elements in RevitMirroring and Flip Elements in RevitTrimming and Extending Elements in RevitOffsetting Revit ElementsCreating Elements Consistently with Match Type Properties and Create SimilarPinning, Splitting and Deleting Revit ElementsUndo, Redo, Cancel an Action and Repeating the Last CommandMoving Revit Elements In-Depth-LookResizing Elements in Revit
Families and ComponentsUnderstanding the Families in RevitComponents and Placing Components/ Hosted Components in ContextUnderstanding and Loading System Family TypesPlacing Elements/Families/Components from the Project BrowserLoading Families and Setting the Default Family Library LocationHow to Download Revit Families/ ComponentsMoving family/Component to a Different HostLoading Autodesk FamilyLoading a Family with a Type CatalogOpening the Family/ Family EditorLoading the Current Family and Reloading a Family into a Project
Annotation Part - I (Dimensions)Creating Permanent Dimensions: Aligned, Linear, Angular, Radial, Diameter & Arc LengthWorking with Permanent DimensionsWorking With Spot Elevation, Coordinates & SlopesModifying DimensionsOverriding Dimension Text & Locking DimensionsControlling Dimension Units & Using Equality ConstraintCreating & Modifying Dimension StylesDimensioning Entire Walls & Change Dimensions from Temporary to PermanentChange the Appearance & Show Temporary Dimensions with Multiple Elements Selected
Views and SheetsCreating Plan Views: Floor/Reflected Ceiling/StructuralUnderstanding Plan Region, View Range, Cut Plan View & UnderlayCreating Elevation Views: Building, Interior, Framing & ReferenceCreating Section, Callout & Reference section/Callout ViewSheet Views: Add a Sheet, Add Views to a Sheet, Use Guide Grids & Using Many More...Complete: Creating/Modifying a Title BlockUnderstanding & Creating/Applying a Viewport Type/View TitleWorking With Placing Schedules on SheetsUnderstanding & Creating a Sheet ListUsing Revision Cloud & Sheet Issues/RevisionsUnderstanding & Using Crop Region/Annotation Crop Region
Schedules/Quantities and Material TakeoffsCreating Schedule By: Fields, Filter, Sorting/Grouping, Formating & AppearanceAdding New Parameter to a ScheduleModify a Schedule By: Parameter, Column, Row, Title & Header & AppearanceWorking With Key ScheduleWorking With Room and Area SchedulesCreating Material Takeoff Schedules
Annotation Part - II (Text Notes, Keynotes, Tags & Symbols.)Adding Text Note, Check Spelling, Find/Replace & Modifying Text PropertiesUsing Keynotes (Element/Material/User) and Keynotes SettingCreating Keynote LegendsUsing Tag By Category & Tag AllUsing Material Tag & Sequential Room/Door/Window TagsEditing Tag & Tag FamilyAdding Symbol & Creating New Symbol
Drafting, Detailing, Legend & Managing Other VIewsCreate a Drafting View & Inserting/Importing/Saving Drafting ViewWork with Detail Line, Detail Component, Repeating Details & InsulationWork with Filled Regions & Masking RegionsCreating a Legend View & Adding Legend ComponentsCreating/Modifying View TypesCreating Duplicate Views: Duplicate/As Dependent/with Detailing
Managing Project Settings & Visibility/GraphicsCreating/Modifying/Using New/Custom Drafting Fill PatternCreating/Modifying/Using New/Custom Model Fill PatternCreating/Modifying/Using New/Exist MaterialCreating New Material LibraryCreating/Modifying/Using Line StyleCreating/Modifying Line Weight & Line PatternCreating/Modifying Object Styles with Using Line Weight/Line PatternUnderstanding & Using Detail LevelElements: Hide/Unhide & Temporarily Hide/IsolateUnderstanding & Controlling Visibility and GraphicOverride Visibility and Graphic Display of an ElementsUnderstanding & Creating View Filters using AND, OR & Nested Rule Sets
Working With Groups, Design Options & Project PhasingUnderstanding the Group ElementsCreating a Detail and a Model GroupsAttaching a Detail GroupModifying Group ElementsLoad and Place GroupsConverting Groups to Linked Models and Linked Models to GroupsSaving and Deleting GroupsUnderstanding Phase and Phase FiltersCreating a Phase and Combining PhasesDemolish Elements toolCreating and Applying a Phase FiltersUnderstanding Design OptionsWorking with Design Options and Option SetsDuplicating, Deleting & Editing Design OptionsPromoting and Accepting Design Options
Managing SettingsManaging & Creating Project Browser View OrganizationTransfer Project StandardsUnderstanding Project Template FilesCreating Own Template FilesDeleting Unused Items from a ProjectAdding/Removing Keyboard ShortcutsUsing the Options Dialog
Sketching ElementsWorking with Listening DimensionsUnderstanding the Sketching Terminology and ElementSketch a Line, Rectangle and CircleSketch an Inscribed and Circumscribed PolygonSketch a Start-End-Radius, Center-Ends and Tangent ArcsSketching Ellipses in RevitSketching Splines in RevitModifying Sketched ElementsClosing an Open LoopSketching a Fillet Arc
Working with Selection Method in RevitUnderstanding Ways to Select Revit ElementsSelecting Elements with Polygon MethodSelecting Multiple ElementsSelecting Family Type ElementsDetermining How Many Elements Are SelectedSelecting Revit Elements Using a FilterSelecting Chain Elements in RevitSelecting Part of a Chain in RevitSelecting Joined Elements at a PointUnderstanding and Selecting an Element with/without the Element IDRestore a Selection and Removing Elements from a Selection
Introduction to Cloud CollaborationBIM 360 and Autodesk Construction Cloud overviewAutodesk Docs and BIM 360 Document ManagementCommon Data Environment (CDE) conceptsAccount Admin and Project Admin roles
Project Setup and AdministrationCreating a project and project settingsAdding members and companiesRoles and folder permissionsFolder structure and naming standardsProject templates
Document ManagementUploading files and version historyViewing 2D sheets and 3D models in the browserMarkups, measure and compare versionsReviews and approval workflowsTransmittals and sharing linksDesktop Connector
Revit Cloud WorksharingCollaborate in the cloud from RevitInitiating cloud collaboration and worksetsSynchronising, publishing and cloud model accessLinking cloud modelsCloud model backups and restoring versions
Design Collaboration ModuleTeams and team spacesCreating and sharing packagesConsuming packages from other teamsTimeline view and change visualisationCoordination between architecture, structure and MEP
Issues, Coordination and Project PracticeCreating and assigning issuesModel Coordination and clash overviewReports and activity logsMulti-discipline collaboration exercise
Introduction to DynamoVisual programming conceptsDynamo for Revit, Dynamo Sandbox and Dynamo StudioInterface: library, workspace, nodes and wiresRunning scripts: automatic and manual modesPreview, watch nodes and organising graphs with groups
Data Types and Code BlockNumbers, strings and booleansRanges and sequencesCode Block and DesignScript syntaxMath and logic nodesIf conditions and filtering
Working with ListsList.Create, List.GetItemAtIndex and List.CountFlatten, Chop and TransposeLacing: shortest, longest and cross productList@Level and List.MapSorting, grouping and FilterByBoolMask
Computational GeometryPoints, vectors and coordinate systemsLines, arcs, curves and NURBSSurfaces and solidsTranslate, rotate and scale geometryParametric facade and pattern studies
Dynamo with Revit ElementsSelect Model Element and CategoriesAll Elements of Category and Family TypesGetParameterValueByName and SetParameterByNamePlacing family instances by pointsCreating levels, grids, walls and floors from Dynamo
Data Exchange with ExcelFile Path and Data.ImportExcelData.ExportExcel for schedulesUpdating Revit parameters from ExcelRoom and sheet data automation
Packages, Custom Nodes and PythonPackage Manager and popular packagesCreating custom nodesIntroduction to the Python Script nodeDynamo Player for team useDocumenting and sharing scripts with a team
Automation ProjectAutomatic sheet and view creationBulk parameter update scriptParametric element placement projectScript review with the trainer
Getting Started with NavisworksNavisworks Manage and the free Navisworks Freedom viewerInterface, ribbon and dockable windowsNWC, NWF and NWD file formatsOpening, appending and merging modelsFile readers and exporters from Revit and AutoCAD
Model Navigation and ReviewOrbit, Walk, Fly and Look AroundNavigation wheels and ViewCubeRealism settings: gravity, collision, crouchSaved viewpoints and viewpoint animationSectioning planes and section boxMeasure tools and Redline markups
Selections and Model DataSelection Tree and selection resolutionProperties window and model dataFind Items and search setsSelection sets for disciplines and systemsHide, override colour and transparencyAppearance Profiler
Clash Detection with Clash DetectiveClash test types: hard, clearance and duplicatesSetting rules and tolerancesRunning tests between selection setsReviewing, grouping and assigning clashesClash status workflow and commentsExporting clash reports in HTML and XML
4D Construction Simulation with TimeLinerCreating tasks manually and with auto-addImporting schedules from MS Project or PrimaveraAttaching selection sets to tasksTask types and appearance settingsRunning and exporting 4D simulations
Animator, Scripter and PresentationAnimator scenes and keyframesScripter events and actionsAutodesk Rendering materials and lightsExporting images and videos
Quantification and CollaborationQuantification workbook setupModel take-off and virtual take-offExporting quantities to ExcelSwitchback to Revit and AutoCADPublishing NWD files and Batch Utility
BIM Coordination ProjectFederating architecture, structure and MEP modelsClash review meeting workflow4D simulation of a building projectFinal coordination report
Getting StartedAbout 3ds Max and it's HistoryInstalling and Uninstalling 3ds MaxLaunching 3ds Max and It's InterfaceUnderstanding & Switching the WorkspacesCreating & Managing the WorkspacesUnderstanding the Start-Up Templates & Template Manager Dialog3DS Max Graphical TerminologySynchronizing the UI and Default Presets
Working with Parametric ObjectsBoxConeSphereGeoSphereCylinderTubePyramidTeapotPlaneTextPLusHedraTorus KnotChamferBoxChamfer CylinderOilTankCapsuleSpindleL-Ext and C-ExtGengonRingWaveHosePrism
Working with File Management CommandsUnderstanding and Setup the UNIT TYPESAssigning Project folderCreating a New SceneResets 3ds Max SettingsUnderstanding and Using the Save CommandsCreating a Prototype FileImporting, Merging and ReplacingThe summary info and object properties
Understanding the Selection MethodSelection by Object WindowSelection With Name WindowSelection by selection regionSelection with window/ crossingName and edit selection setUnderstanding selection FilterUnderstanding Naming ObjectsHiding, Unhiding, Isolate and Freezing objects
Viewing and Navigating 3D Space TechniquesMaximizing the 3D WorkspaceUnderstanding View TypesSwitching & Setting Viewport LayoutMaximizing and Resizing the ViewportUnderstanding Viewport Label & Changing the View TypeWorking with the Zooming, Panning and Orbiting Tools
Working With Transform Tools & It's TechniquesUnderstanding & Using Transform/ Gizmo ToolsUsing Type-in WindowUsing Transform Tools with Reference Coordinate SystemUsing Transform Tools with Center FlyoutUsing the Axis ConstraintsPositioning an objectUsing Transform Toolbox
Working with Duplicate ObjectsTechniques for Cloning ObjectsCreating Linear, Circular and Spiral ArraysUsing Mirror and Spacing ToolsUsing Align FlyoutUsing Clone and align ToolsUsing Snapshot Tools
Working with Group and Assembly in 3DS MAXUnderstanding & Creating Groups and AssemblyAttach & Detach an Object from Existing Groups and AssemblyDissolving Groups and Assemblies
Using Layer to Organize a Scene
Creating 2D shapesUnderstanding 2D Shapes and Creating LineCreating Rectangle, Circle, Ellipse and Arc ShapeCreating Donut, NGon and Star ShapeCreating Text, Helix and Egg ShapeCreating Freehand ShapeCreating Extended spline ShapesCreating Nesting 2D ShapesUsing Grid TypesCreating 2D Shapes from 3D objects
Introduction to Enscape and Real-Time RenderingWhat real-time rendering isEnscape toolbar inside RevitStarting Enscape and Live UpdatesWalk mode, fly mode and navigation keysSynchronising views and saving view positions
Visual SettingsRendering quality and render stylesImage settings: exposure, depth of field and bloomAtmosphere: fog, illumination and windSky: horizon, clouds and time of daySaving and loading visual setting presets
Enscape MaterialsMaterial editor and Revit material syncAlbedo, bump and roughness mapsReflection and metallic surfacesGlass, water, grass and carpet typesSelf-illumination and texture scaling
Lighting and Asset LibrarySun position and Revit project locationRevit light families in EnscapeEnscape area, spot and sphere lightsNight scenes and interior lightingPlacing people, vegetation, vehicles and furniture assets
Output: Images, Panoramas and VideosScreenshots and batch rendering360-degree mono and stereo panoramasVideo editor and keyframe pathsRender resolution and export settingsStandalone executable and web standalone exportVR headset preview overview
Presentation ProjectInterior render set for a residenceExterior day and night rendersWalkthrough video of a buildingFinal presentation review
Laser Scanning and Point Cloud BasicsWhat Scan to BIM is and where it is usedTerrestrial laser scanners, mobile and drone LiDARScan planning, targets and scan positionsPoint cloud formats: E57, LAS, PTS and RCP/RCSLevel of Detail (LOD) and accuracy expectations
Processing Scans in Autodesk ReCapReCap interface and project creationImporting and indexing scan filesAutomatic and manual registrationCleaning noise, cropping regions and limit boxesDecimating and exporting RCP project files
Bringing Point Clouds into RevitInsert Point Cloud and positioning optionsShared coordinates and survey pointPoint cloud visibility and colour modesSection boxes and crop regions for tracingWorkplanes and reference planes from scan
Architectural and Structural Modelling from ScanLevels and grids from point cloudTracing walls, doors and windowsFloors, ceilings, stairs and roofsColumns, beams and structural framingHandling uneven and non-vertical surfaces
MEP Modelling and Quality CheckPipes, ducts and cable trays from scanFixtures and equipment placeholdersDeviation checking between model and scanOverlaying scan and model in NavisworksAs-built drawings, schedules and sheets
Scan to BIM ProjectRegistering a sample building scanModelling an existing floor from point cloudAccuracy review with the trainerDelivering the as-built model and sheets
STAAD Pro CONNECT Edition23 chapters · 172 topics+
An Overview of Structure Analysis and DesignNeed of Structure Analysis and DesignTypes of StructuresIdealization of Structures
Introduction To STAAD Pro/ STAAD.Pro Advance/ STAAD EnterpriseWhat is Staad pro? ( STAAD - stands for STructural Analysis And Design)History of Staad ProWhy, Where & Who Can use STAAD ProAnalysis & Design life cycle Concept to reach your GoalHardware Requirements & Installation ProcedureLimits on Staad Pro Models
Getting Started - Staad.Pro CONNECT EditionStarting STAAD.Pro CONNECT Edition ApplicationCreating New Model in STAAD ProOpening Model in STAAD ProExploring STAAD Pro UI(User Interface)Understanding Co-ordinate systems – Global & LocalManipulating vertical axisConfiguring the Base UnitChanging the Input UnitConverting Input Unit in Input FieldUsing Unit ConverterUnderstanding the selection methodSaving , Saving As & Auto-Save Project
Geometry Creation - IWhat are Nodes, Beams and Plates?Grid system: Linear/Radial/IrregularImporting Grid in STAADCrating Geometry by Snap/GridCreating Geometry with TablesAdd beam - point to point, between midpoints, perpendicular intersection, curved membersSplit Beam or Insert Node - for a single member and multiple memberConnect Beam Along - X Axis /Y Axis /Z AxisBreak Beams at selected nodesAdding a node at overlapping beamsMerge selected members & nodesStretch a memberRenumbering Members & NodesExercise Files : Downloadable
Geometry Creation - IICreating Quad & Triangle Plate : Using Grid snap & NodeCreating Plates from MembersCreating Parametric Model: SurfaceGenerating Surface Mesh & Plate MeshDraw a Solid GeometryRenumbering Plates & SolidsUsing Structure Wizard: Five Step to Complete GeometryImporting GeometryExercise Files: Downloadable
Useful Function to Complete the GeometryMoving Selected objectsCut, Copy & Paste Selected objectsRotating Selected objectsMirroring Selected ObjectsCopying Geometry Along a Linear PathCopying Geometry Along a Circular PathUnderstanding Moving Origin ConceptUnderstanding Undo/ Redo/ Delete operations
Viewing & Selecting the STAAD GeometryExploring viewing, Rotating and Zooming toolsEnabling the Geometry Label, Color & It's OptionsWorking with Views: New, Save, Open, Add, Rename, Detach View & View SelectedChanging the axis of rotation & OrientationUsing Cursor method to Select STAAD ModelUsing Geometry, Node, Beam, Plate & Solid Selection toolsUsing Advance Selection TechniquesIdentifying and Enabling the Beam End PointsUsing 3D Rendered View & Their OptionsExercise File: Download
Using Material, Material Constants & Member OrientationCreating a New Isotropic & Orthotropic MaterialAssigning Material & Material ConstantsEnabling section outline/full sectionAssigning Member Rotation Angle - TypesChanging /Removing Reference & Plate Reference Orientation
Using Structural Model Sections / ProfilesUnderstanding the different types of Beams and Their UsesUnderstanding the different types of Columns and Their UsesUnderstanding the different types of Slab/Girder/Shell and Their UsesAdding & Assigning the Prismatic SectionAdding & Assigning Section Database ProfileCreating a General SectionAdding & Assigning Tapered & Other Specific ProfileAdding & Assigning Plate/ Surface ThicknessConfiguring the Section Database ManagerUnderstanding & using Section Wizard
Understanding & Using Node, Member & Plate SpecificationsUnderstanding & Assigning Master Slave & Floor DiaphragmAssigning Compression-only, Tension-only, or a Truss (axial-only) Spec. on a MemberAssigning Member End Release or Partial Member End Release Spec. on a MemberUsing Member end offsets Spec...Using Member Drift or Camber & Fire Proofing Spec...Using Cable & Cracked Section Properties Spec...Using Plate Specification Types
Understanding & Using Different Types of SupportsUsing Fixed & Pinned SupportAssigning a Custom SupportAssigning a Spring Support - One way, Fixed But & MultilinearAssigning an Inclined supportAssigning a Foundation SupportAssigning an Enforced & Enforced But SupportOverview of Support & Support Dialog Box
Loading in STAAD.ProIntroduction to Loading and the LOAD LIST CommandUnderstanding and Adding Primary Load TypesUnderstanding the Load Item Categories and Adding SelfweightAssigning Loads on Frame MembersUnderstanding the Direction of LoadingApplying Loads at an Offset from the Shear CenterAssigning a Concentrated Force/Moment at the Start and/or End of a MemberControlling the visibility of the Loads in the STAAD.Pro GUIAdding Fixed End Member LoadsProblem Solving approach for Member LoadUnderstanding and Assigning Floor Loads and One-Way LoadsAssigning Floor Load and One-way Load on Inclined PlanesAssigning Floor and One-way Loads with Openings on a Floor or RegionProblem Solving approach for Floor and One-way LoadUnderstanding and Assigning Area LoadUnderstanding and Assigning Support Displacement LoadProblem Solving approach: For Support Displacement LoadUnderstanding and Assigning Loads on PlatesUnderstanding and Assigning Loads on Solids
Wind and Snow Load Generation in STAAD.ProIntroduction and Data Required for Wind Load GenerationUnderstanding Types of Structures and various aspects involved in Wind Load GenerationAdding & Assigning Wind Load to Staad.Pro ModelTypes of Load Generated and Converting the Wind Pressures to Concentrated and Distributed Loads on the StructureExcluding Members when Generating LoadsProblem Solving Approach: For Wind Load GenerationUnderstanding and Assigning the Snow Load as per IS Code
Seismic Load Generation in STAAD.ProAdding Seismic Load Definition As per IS-CodeAdd Weight Items to a Seismic Load DefinitionAdding & Assigning a Seismic Load to STAAD.Pro Model
Combining Load Cases in STAAD. ProIntroduction to Load CombinationDefining New Load Combinations and Load TypeGenerating Auto Load Combinations as per Indian Code
Checking STAAD Pro Model for AnalysisChecking for Multiple StructuresChecking for Warped Plates and Plates ConnectivityChecking & Removing Duplicate Entities: Nodes, Beams & PlatesChecking & Removing Zero Length Members, Orphan Nodes & Overlapping Collinear MembersChecking Negative Volume Solids & Warped SolidsChecking & Removing Dimension: All Member/ Node to Node
Overview of the Performing Analysis, Reviewing outputs and Performing post-processing tasksUnderstanding Types of Analysis and Performing an Analysis in STAAD.ProUnderstanding and Performing a Multi-Run AnalysisUnderstanding and Using Pre-Analysis CommandsUnderstanding and Using Post-Analysis CommandsUnderstanding and Using Miscellaneous CommandsUnderstanding STAAD Output ViewerUnderstanding and Using Post-processing Workflow in depth
Stability Analysis and Design in Staad ProUnderstanding the Stiffness Analysis MethodUnderstanding Linear Elastic AnalysisPerforming First order AnalysisUnderstanding and Performing Direct Analysis Method
Designing Concrete Structure: By Batch Design per IS CODEUnderstanding the Available Concrete Design CodesUsing Batch Member and Element Design OperationsProject 1: Design of Reinforced Concrete Structures using Seismic LoadsProject 2: Design of Reinforced Concrete Structures using Wind LoadsProject 3: Design of Reinforced Concrete Structures using Other Load Cases
Designing Steel Structure: By Batch Design per IS CODEWhy Steel? Available Steel Design Codes in Staad ProUnderstanding the IS 800-1984/2007 WSD or LSD codes & it's Parameter.Designing the Steel Structure per IS 800 - 1984/2007 WSD or LSD CodesUnderstanding & Designing the Cold Formed Steel Structure per IS 801 - 1975 CodeUnderstanding & Designing the Steel Structure per IS 802 - 1995 CodeBatch Design Operations for Steel Design
Designing Concrete Structure: By Interactive Concrete Design per IS CODEIntroduction and General Overview of Suitable Member Properties & File TypesOpening Model and Understanding the Interactive Concrete Design workspacePreparing Member and Slabs for Designing In-Depth-LookUnderstanding and Adding the Envelopes Load Cases and CombinationsDefining the Criteria for Beam and Column Design In-Depth-LookAssigning Design Criteria in Beam and Column In-Depth-LookApplying Member for Design or Check and Viewing the ResultsUnderstanding & Using Report Setup ProcessProject Work for Interactive Concrete Design
Generating & Plotting Reports from STAAD Pro & Data ManagementGenerating Report ContentsAdding A Custom Header And Logo To ReportsGenerate Transfer Forces & Floor Vibration ReportPreviewing, Screenshot, Plotting & Exporting ReportsCreating Customized Reports From RC Framed StructureCreating Customized Reports From Steel Portal Frame StructureCreating Customized Reports From Plate StructureConverting Staad files to ArchivesUnderstanding the Exporting option
Project Included (Basic & Advance)Analysis and Design of Rectangular/Circular Water Tank, Elevated INTZE TankAnalysis and Design of One-way & Two-way SlabAnalyse & Design the Shear Wall using STAAD.Pro v8i SS6. (Not Available in Connect Edition Version)
STAAD Pro Advanced CONNECT Edition28 chapters · 240 topics+
An Overview of Structure Analysis and DesignNeed of Structure Analysis and DesignTypes of StructuresIdealization of Structures
Introduction To STAAD Pro/ STAAD.Pro Advance/ STAAD EnterpriseWhat is Staad pro? ( STAAD - stands for STructural Analysis And Design)History of Staad ProWhy, Where & Who Can use STAAD ProAnalysis & Design life cycle Concept to reach your GoalHardware Requirements & Installation ProcedureLimits on Staad Pro Models
Getting Started - Staad.Pro CONNECT EditionStarting STAAD.Pro CONNECT Edition ApplicationCreating New Model in STAAD ProOpening Model in STAAD ProExploring STAAD Pro UI(User Interface)Understanding Co-ordinate systems – Global & LocalManipulating vertical axisConfiguring the Base UnitChanging the Input UnitConverting Input Unit in Input FieldUsing Unit ConverterUnderstanding the selection methodSaving , Saving As & Auto-Save Project
Viewing & Selecting the STAAD GeometryExploring viewing, Rotating and Zooming toolsEnabling the Geometry Label, Color & It's OptionsChanging the axis of rotation & OrientationUsing Cursor method to Select STAAD ModelUsing Geometry, Node, Beam, Plate & Solid Selection toolsUsing Advance Selection TechniquesIdentifying and Enabling the Beam End PointsWorking with Views: New, Save, Open, Add, Rename, Detach View & View SelectedUsing 3D Rendered View & Their OptionsExercise File: Download
Geometry Creation - IWhat are Nodes, Beams and Plates?Grid system: Linear/Radial/IrregularImporting Grid in STAADCrating Geometry by Snap/GridCreating Geometry with TablesAdd beam - point to point, between midpoints, perpendicular intersection, curved membersSplit Beam or Insert Node - for a single member and multiple memberConnect Beam Along - X Axis /Y Axis /Z AxisBreak Beams at selected nodesAdding a node at overlapping beamsMerge selected members & nodesStretch a memberRenumbering Members & NodesExercise Files : Downloadable
Geometry Creation - IICreating Quad & Triangle Plate : Using Grid snap & NodeCreating Plates from MembersCreating Parametric Model: SurfaceGenerating Surface Mesh & Plate MeshDraw a Solid GeometryRenumbering Plates & SolidsUsing Structure Wizard: Five Step to Complete GeometryImporting GeometryExercise Files: Downloadable
Useful Function to Complete the GeometryMoving Selected objectsCut, Copy & Paste Selected objectsRotating Selected objectsMirroring Selected ObjectsCopying Geometry Along a Linear PathCopying Geometry Along a Circular PathUnderstanding Moving Origin ConceptUnderstanding Undo/ Redo/ Delete operations
Using Material, Material Constants & Member OrientationCreating a New Isotropic & Orthotropic MaterialAssigning Material & Material ConstantsEnabling section outline/full sectionAssigning Member Rotation Angle - TypesChanging /Removing Reference & Plate Reference Orientation
Using Structural Model Sections / ProfilesUnderstanding the different types of Beams and Their UsesUnderstanding the different types of Columns and Their UsesUnderstanding the different types of Slab/Girder/Shell and Their UsesAdding & Assigning the Prismatic SectionAdding & Assigning Section Database ProfileCreating a General SectionAdding & Assigning Tapered & Other Specific ProfileAdding & Assigning Plate/ Surface ThicknessConfiguring the Section Database ManagerUnderstanding & using Section Wizard
Understanding & Using Node, Member & Plate SpecificationsUnderstanding & Assigning Master Slave & Floor DiaphragmAssigning Compression-only, Tension-only, or a Truss (axial-only) Spec. on a MemberAssigning Member End Release or Partial Member End Release Spec. on a MemberUsing Member end offsets Spec...Using Member Drift or Camber & Fire Proofing Spec...Using Cable & Cracked Section Properties Spec...Using Plate Specification Types
Understanding & Using Different Types of SupportsOverview of Support & Support Dialog BoxUsing Fixed & Pinned SupportAssigning a Custom SupportAssigning a Spring Support - One way, Fixed But & MultilinearAssigning an Inclined supportAssigning a Foundation SupportAssigning an Enforced & Enforced But Support
Loading in STAAD.ProIntroduction to Loading and the LOAD LIST CommandUnderstanding and Adding Primary Load TypesUnderstanding the Load Item Categories and Adding SelfweightAssigning Loads on Frame MembersUnderstanding the Direction of LoadingApplying Loads at an Offset from the Shear CenterAssigning a Concentrated Force/Moment at the Start and/or End of a MemberControlling the visibility of the Loads in the STAAD.Pro GUIAdding Fixed End Member LoadsProblem Solving approach for Member LoadUnderstanding and Assigning Floor Loads and One-Way LoadsAssigning Floor Load and One-way Load on Inclined PlanesAssigning Floor and One-way Loads with Openings on a Floor or RegionProblem Solving approach for Floor and One-way LoadProblem Solving approach: For Load on Curved MembersUnderstanding and Assigning Area LoadUnderstanding and Assigning Support Displacement LoadProblem Solving approach: For Support Displacement LoadUnderstanding and Assigning Loads on PlatesUnderstanding and Assigning Loads on SolidsUnderstanding and Assigning Prestressing Loads on StructureUnderstanding and Assigning Temperature Loads on Members, Plates and SolidsUnderstanding and Assigning Strain Loads
Checking STAAD Pro Model for AnalysisChecking for Multiple StructuresChecking for Warped Plates and Plates ConnectivityChecking & Removing Duplicate Entities: Nodes, Beams & PlatesChecking & Removing Zero Length Members, Orphan Nodes & Overlapping Collinear MembersChecking Negative Volume Solids & Warped SolidsChecking & Removing Dimension: All Member/ Node to Node
Overview of the Performing Analysis, Reviewing outputs and Performing post-processing tasksUnderstanding Types of Analysis and Performing an Analysis in STAAD.ProUnderstanding and Performing a Multi-Run AnalysisUnderstanding and Using Pre-Analysis CommandsUnderstanding and Using Post-Analysis CommandsUnderstanding and Using Miscellaneous CommandsUnderstanding STAAD Output ViewerUnderstanding and Using Post-processing Workflow in depth
Stability Analysis and Design in Staad ProUnderstanding the Stiffness Analysis MethodUnderstanding Linear Elastic AnalysisPerforming First order AnalysisUnderstanding and Performing Direct Analysis Method
Wind and Snow Load Generation in STAAD.ProIntroduction and Data Required for Wind Load GenerationUnderstanding Types of Structures and various aspects involved in Wind Load GenerationAdding & Assigning Wind Load to Staad.Pro ModelTypes of Load Generated and Converting the Wind Pressures to Concentrated and Distributed Loads on the StructureExcluding Members when Generating LoadsProblem Solving Approach: For Wind Load GenerationUnderstanding and Assigning the Snow Load as per IS Code
Seismic Load Generation in STAAD.ProAdding Seismic Load Definition As per IS-CodeAdd Weight Items to a Seismic Load DefinitionAdding & Assigning a Seismic Load to STAAD.Pro Model
Combining Load Cases in STAAD. ProIntroduction to Load CombinationDefining New Load Combinations and Load TypeGenerating Auto Load Combinations as per Indian CodeEditing and Applying the NEW Load Combinations RulesUnderstanding and Using Repeat LoadsUnderstanding and Using Reference LoadsUnderstanding and Using Mass Loading With Reference Loads
Using Dynamic Properties, Loads and Performing Dynamic AnalysisIntroduction to Dynamic Properties of StructuresUnderstanding the Frequencies and Modes Properties (IN-DEPTH)Project: Using Rayleigh Method to Calculate the FrequencyProject: Using the Rayleigh Method to Calculate the FrequencyUnderstanding the Damping Properties (IN-DEPTH)Introduction to Dynamic LoadUnderstanding the Response Spectrum Loading and Analysis (IN-DEPTH)Project: Response Spectrum Analysis as per IS 1893 in Staad ProProject: Response Spectrum with Direct Analysis in Staad ProUnderstanding the Time History Loading and Analysis (IN-DEPTH)Project : Performing a Seismic Response History AnalysisProject 2: Time History Analysis for Sinusoidal LoadingProject 3: Time History Analysis of a Frame for Seismic LoadsProject 4: Time History Analysis for Forcing Function and Ground MotionUnderstanding the Other Dynamic Load TypesProject : Based on Other Dynamic Load Types
Performing Second Order Stability AnalysisUnderstanding the P-Delta AnalysisProject: Performing P-Delta AnalysisUnderstanding the Buckling AnalysisProject: Performing Buckling AnalysisUnderstanding the Static Geometrically Nonlinear AnalysisProject: Performing Static Geometrically Nonlinear AnalysisUnderstanding the Imperfection AnalysisProject: Performing Imperfection AnalysisUnderstanding the Multilinear AnalysisProject: Performing Multilinear AnalysisUnderstanding the Tension- and Compression-Only AnalysisProject: Performing Tension- and Compression-Only AnalysisUnderstanding the Nonlinear Cable or Truss AnalysisProject: Performing Nonlinear Cable or Truss AnalysisUnderstanding the Advanced Nonlinear Cable AnalysisProject: Performing Advanced Nonlinear Cable Analysis
Using Pushover Loads to STAAD.Pro ModelOverview of Pushover AnalysisPushover Analysis Engineering ReferenceDefining the General Input and Member Specific DataDefining Loading Pattern & Spectrum DetailsDefining Hinge Property & Solution Control DetailsDefining Other Load Case Details to Complete Pushover AnalysisValidation of Commands other than Input ParametersAdding & Analyzing Pushover AnalysisReviewing Pushover Analysis Results: By Postprocessing ModePushover Analysis Example -1Pushover Analysis Example -2
Designing Concrete Structure: By Batch Design per IS CODEUnderstanding the Available Concrete Design CodesUsing Batch Member and Element Design OperationsProject 1: Design of Reinforced Concrete Structures using Seismic LoadsProject 2: Design of Reinforced Concrete Structures using Wind LoadsProject 3: Design of Reinforced Concrete Structures using Other Load Cases
Designing Steel Structure: By Batch Design per IS CODEWhy Steel? Available Steel Design Codes in Staad ProBatch Design Operations for Steel DesignUnderstanding the IS 800-1984/2007 WSD or LSD codes & it's Parameter.Designing the Steel Structure per IS 800 - 1984/2007 WSD or LSD CodesUnderstanding & Designing the Cold Formed Steel Structure per IS 801 - 1975 CodeUnderstanding & Designing the Steel Structure per IS 802 - 1995 Code
Designing Concrete Structure: By Interactive Concrete Design per IS CODEIntroduction and General Overview of Suitable Member Properties & File TypesOpening Model and Understanding the Interactive Concrete Design workspacePreparing Member and Slabs for Designing In-Depth-LookUnderstanding and Adding the Envelopes Load Cases and CombinationsDefining the Criteria for Beam and Column Design In-Depth-LookAssigning Design Criteria in Beam and Column In-Depth-LookApplying Member for Design or Check and Viewing the ResultsUnderstanding & Using Report Setup ProcessProject Work for Interactive Concrete Design
Designing of Composite Structure as per AISC 360Introduction to Composite Building or Composite Platform Structure
Using Bridge Deck workflow & Moving Loads to STAAD.Pro ModelDefining Vehicle Load DefinitionGenerating Moving Load CasesAdding Vehicles to the Load GenerationInitiating & Opening Model in the bridge deck workflowConverting a Plate into Bridge DeckGenerating & Observing Influence SurfacesDefining a RoadwayDefining Vehicle Parameter for Load DataGenerating Loads on the RoadwayTransfer The Loads To STAAD.ProProject 1: Analysis and Design The Box Culvert Using Moving Load with IRC CodeProject 2: Analysis and Design the Steel Bridge Using Moving Load/Vertical Load ConceptProject 3: Designing Bridge Structures using Bridge Deck workflow with IRC CodeProject 4: Analysis and Design the Other structure using Bridge Deck/Moving Load
Generating & Plotting Reports from STAAD Pro & Data ManagementGenerating Report ContentsAdding A Custom Header And Logo To ReportsGenerate Transfer Forces & Floor Vibration ReportPreviewing, Screenshot, Plotting & Exporting ReportsCreating Customized Reports From RC Framed StructureCreating Customized Reports From Steel Portal Frame StructureCreating Customized Reports From Plate StructureConverting Staad files to ArchivesUnderstanding the Exporting option
Project Included (Basic & Advance)Analysis and Design of Rectangular/Circular Water Tank, Elevated INTZE TankAnalysis and Design of One-way & Two-way SlabAnalysis and Design of Staircase.Analyse the Dome Structure Using Finite Element Analysis (FEA)Analyse & Design the Shear Wall using STAAD.Pro v8i SS6. (Not Available in Connect Edition Version)
Getting Started with STAAD RCDCIntroduction to STAAD RCDCPreparing & Linking STAAD Pro File with RCDCPreparing & Linking ETABS File with RCDCUnderstanding the Import & Export toolsUnderstanding Load & Load Combinations
RCC Designing , Detailing, Drawing and DocumentationFooting Design Part IFooting Design Part IIFooting Design Part IIIPile CAP Design Part IPile CAP Design Part IIPile CAP Design Part IIIColumn/Wall Design Part IColumn/Wall Design Part IIColumn/Wall Design Part IIIBeam Design Part IBeam Design Part IIBeam Design Part IIISlab Design Part ISlab Design Part IISlab Design Part IIIBar Bending Schedule Arrangement
Getting Started Microsoft ProjectIntroduction of Microsoft Project and It's Release HistoryHow to download and install MSPWhat is Project Management & Understanding It's WorkflowExplore the Project user interfaceManage files and set options in the Backstage viewSetup A New Project FileEntering Project Properties And InformationUsing One Of The Project Template
Project TasksAdding tasks with durationOrganizing Tasks Into Logical GroupMoving, Deleting And Inserting New Task RowMaking A Task Inactive/ ActiveCreating MilestonesWorking with Task Duration and Estimated task DurationAdding Extra Notes And Attachment To TasksAdding The Project Summary TasksUsing Method Of Linking The TasksUnderstanding & Defining Different Task Link TypeAdding A Lag And Exploring Elapsed TypeSpell Check And Format The Task PaneFinding And Replacing Text In The Task Pane
Working with a Project FileNavigating To A Date Or TaskChanging The Date Zoom In The Gantt ChartShorting Project TasksFiltering Project Tasks And Filtering OptionHighlighting importance Project tasksGrouping Project task into logical groupAssigning Deadline constraintsExploring constraints typeInvestigating calendar and network diagram viewMaking use of the task inspectorDetermining the critical path
Resourcing Your ProjectUnderstanding the Resource Type AvailableAdding Resource in the ProjectAssigning Resource to TasksUnderstanding the Task Type and their Effect on Assigning Work ResourcesMultiple Resource Assignment to Multiple TaskAdding Fixed Costs to a ProjectUsing a Split View to Dig Deeper in to a ProjectOption for Dealing with Resource OverallocationAdding Overtime in to a TaskApplying resource leveling
The TimelineDisplay or Hide the Timeline and Add/Remove taskFilter Displayed Tasks and Use Callout TaskZoom and pan in or outEditing date and text formattingExporting the timeline to other program
Tracking and Managing Your ProjectMoving the Project Start Date and The Save BaselineChanging the Current Date and Format the Current Date LineUpdating Individual Task ProgressionUpdating Multiple Task ProgressionTracking Gantt View for Monitoring ProjectManually Splitting Tasks
Working with Calendar and Working TimeThe Working Time DefaultViewing and Amending the Standard CalendarAmending Work Resources CalendarCreating Recurring Absence PatternsCreating and Assigning a Custom CalendarAssigning a Calendar Directly to a TaskMaking Your Custom Calendar Available to Other Projects
Reporting Project InformationPrinting Setup for Gantt ChartChoosing One of The New Project ReportsCreating Your Own Chart ReportCreating New Report From NothingCopying Reports Between Projects and Deleting ReportsDeleting ReportExporting New Report to pdfUsing the visual Reports Export OptionExporting Project Data to Excel
Working with Multiple Project and Master ReportWhy Have Master Projects?Creating and Using the Master ProjectCreative Link Between Sub ProjectCreating a Resource PoolUsing the Resource in Multiple ProjectKeeping the Resource Pool Updated
Recurring task in actionRecurring task in actionEditing and removing recurring task
WBS (Work Breakdown System) CodeWhat is WBS?Creating and Using Your Own WBS Code
Global Template and Global SettingUnderstanding the Global Template and Using The organizerCreate and Customize Your Own Gantt Chart
IntroductionIntroduction of Primavera P6 ProfessionalPrimavera Release HistoryWhat is Project and Project Management?Why Use Project Portfolio Management?Understanding the Your Role in the OrganizationUnderstanding the Project Management Process OverviewProject Management Life Cycle (Planning, Controlling, and Managing Projects)
Getting started project management modulePrimavera P6: Downloading, Installing and Configuring the DatabaseSet Language, Industry Terminology, and Custom CurrenciesLaunching & Understanding the Primavera P6 Professional WorkspaceCustomizing the Toolbars & Managing the P6 workspaceCustomizing Menus Bars in Primavera P6Reset the toolbars and menus to factory defaults in Primavera P6
Understanding and Setup User Preferences SettingDefine user preferencesFormatting Time UnitsFormatting DatesSetting Currency SymbolUnderstanding the WizardSetting Mail PreferencesSetting Startup, Group, Sort, and Column DefaultChanging your PasswordSetting Profile and Spreadsheet Data OptionsSetting Calculation Options for Resource and RoleSelecting Startup Filters
Working with Projects and PortfoliosCreating a ProjectOpening and Closing a ProjectCopying, Pasting and Deleting a projectRefresh data and Updating data to the databaseUnderstanding "what-if" scenarios and Set-up Default projectCreating, Renaming and Deleting a portfolioAdding Projects to a Portfolio and Removing Projects from a PortfolioAdding Users to a portfolioChange the Current Portfolio and Viewing Portfolio Details
Working with EPS, OBS and WBSUnderstanding and Defining Enterprise Project StructureOrganizing the EPS structureAdding/Deleting a project to the EPS hierarchyCopy an EPS node or projectUnderstanding, Adding & Editing Organizational breakdown structure (OBS)Cut, Copy, Paste and Delete an OBS elementViewing/Changing the OBS/OBS Chart Display & OBS Chart InformationMove around the OBS chartUnderstanding WBS (Work Breakdown Structure) and Top-Down PlanningAdding, Editing and Deleting a WBS elementUnderstanding & Assigning WBS weighted milestonesUnderstanding and Determining a WBS element's statusCut, Copy and paste a WBS elementViewing/Changing the WBS, Chart/Table display and Moving WBS chart
CalendarsDefining default hours per time period in calendarsUnderstanding the Global vs. Project vs. Resourse CalendarsCreating and Deleting a Project CalendarEditing and Viewing Project Calendar; AssignmentsCreating, Editing and Setting Default a global calendarViewing Global Calendar Assignments and DeletingCreating/Editing/Deleting a shared/Personal resource calendarView resource calendar assignments & Convert calendar to ...
Working with ActivitiesUnderstanding & Adding the ActivityUnderstanding the Activity datesEnter Activity Durations, Activity Start and Finish datesUnderstanding & Defining the Activity TypesUnderstanding & Defining the Activity Duration TypesDeleting an Activity & Defining MilestonesCut, Copy and Paste an ActivitiesUnderstanding the Activity Relationships and TypesAdding Relationships B/w Activities (in depth-look)Dissolving an ActivityAssigning a Calendar to an ActivityAdding Lead and Lag Duration to an ActivityChanging/Removing Relationships from Predecessor & Successor TABEditing/Deleting Relationships in the Gantt Chart & Activity NetworkRenumber activity IDs in the Activity TableViewing activity relationships
Resources, Roles and Resource CurvesUnderstanding the ResourcesUnderstanding the Resource SecurityAdding resourcesCreating & Assigning Shared/Personal Resource Calendars to ResourcesDisplay, Edit, Cut, Copy Paste and Delete a ResourcesChanging the Resource Type for ResourcesDefining, Deleting & Specifying the Unit of Measure for Material ResourcesUnderstanding & Adding RolesViewing, Editing and Deleting RolesChanging the Proficiency of a RoleDefining price/unit rates and Role Limits Over TimeUnderstanding, Adding and Deleting the Resource curves
Managing Project Default DataManaging Projects using the EPS & Defining Project DetailsEntering Project Dates & Specify a Fiscal Start MonthChange the Project Name & IDChanging the Project's StatusChanging the Project Leveling PrioritySetting-up Activity ID optionsSet the Default Price for Activities & Rate Type for Resource AssignmentsSet the Project Default Activity Type & Activity Duration TypeSet the Project Default Activity Percent Complete Type & Activity CalendarSet the Default Cost Account & the Float Time for Identifying Critical Activities
Defining Project, Resource, and Activity CodesUnderstanding & Creating Project Codes and ValuesEditing, Deleting & Assign Project Codes and ValuesUnderstanding & Creating Resource Codes and ValuesEditing, Deleting & Assign Resource Codes and ValuesUnderstanding the Activity codes and valuesDefining Global Activity Codes, Values and Values ColorsDefining Project Activity Codes, Values and Values ColorsDefining EPS-level Activity Codes, Values and Values ColorsAssigning/Changing/Removing Activity Codes & Values to/From Activities
Assigning Resources, Roles and Resource CurvesAssigning and Removing Resources to ActivitiesAssociate a Primary Resource with an ActivityReplacing Resources Assigned to ActivitiesAssigning a Rate Type to a Resource AssignmentChoosing the Rate Source for an AssignmentAssign Roles to Resources from the Resources Window and Roles Dialog BoxAssigning resources to activities by roleChanging the Resource's Role Assignments for an ActivityAssigning Roles to ActivitiesAssigning and Removing a Curve to a Resource or Role Assignment
Defining Custom Fields, Grouping & Sorting, Filtering, and Summarizing DataUnderstanding and Defining Custom User FieldsGrouping & Sorting Data in Depth LookFiltering Data in Depth LookSummarizing Data
Entering Cost Information and Expenses for an ActivitiesUnderstanding and Adding ExpensesAssigning Expense Categories & Customize Expense ColumnsSpecifying an Accrual Type, Entering cost information & Changing an expense's activity assignmentCuting, Copying, Pasting and Deleting ExpensesUnderstanding and Creating a Cost Account HierarchyCuting, Copying, Pasting and Deleting Cost AccountSeting the Project Default & Editing a Cost account
Adding Activity Steps/=Template & Assigning Templates & NotebooksUnderstanding & Adding Activity StepsUpdating & Removing Activity StepsAdding Weights to StepsUnderstanding & Creating Activity Step TemplatesConvert Steps into an Activity Step TemplateAssign Activity Step Templates to ActivitiesAssigning/Removing Notebooks to/from Activities
Managing Primavera Projects - IWorking with Budgets, Funding Sources and Spending AmountsWorking with Baseline in PrimaveraWorking with Updating Projects ScheduleUnderstanding and Calculating the Earned ValueWorking with Creating and Using ReflectionsUnderstanding the Scheduling Projects and "Nondriving" Resource AssignmentsUnderstanding and Assigning the Types of constraintsUnderstanding the CPM (Critical Path Method - Manually)Working with CPM (Critical Path Method) in PrimaveraWorking with Scheduling Projects
Managing Primavera Projects - IIWorking with Leveling ResourcesAdding and Assigning IssuesAdding and Assigning ThresholdsAdding and Assigning Risks (P6 Professional Only)Adding and Assigning Work Products and Documents
Customizing LayoutsCustomizing Activity Table - in Depth LookCustomizing Detail Window & Adding Line No.Using Timescaled Layout OptionsCustomizing The Gantt Chart - in Depth LookCustomizing The Activity Network - in Depth LookUnderstanding and Using Trace Logic OptionsActivity Usage Profile - in Depth LookActivity Usage Spreadsheet - in Depth LookResource Usage Profile - in Depth LookResource Usage Spreadsheet - in Depth LookPreparing, Saving, Opening & Deleting a Layout
Tracking Primavera ProjectsUnderstanding the Tracking, Tracking Layouts and Types of Tracking LayoutsSaving, Exporting, Importing and Deleting the Tracking LayoutsManaging the Tracking LayoutsWorking with Project Table layoutsWorking with Project Bar Chart LayoutsWorking with Project Gantt/ProfilesWorking with Resource Analysis layoutsWorking with the Gantt ChartWorking with the Profile and Spreadsheet
Introduction to Tekla StructuresSteel detailing workflow from model to shop drawingsTekla configurations, environments and rolesInterface, ribbon, side pane and quick access toolbarCreating a new model and project propertiesSaving, autosave and model folder contents
Grids, Views and Work PlanesCreating and modifying gridsGrid views, basic views and 3D viewsView properties, depth and visibilityWork planes and local coordinate systemsSnapping, point creation and construction linesSelection filters and view filters
Modelling Steel MembersProfile and material cataloguesColumns, beams and polybeamsBracing, purlins and girtsPlates and contour platesBuilt-up and tapered membersCopy, move, mirror and array tools
Detailing PartsBolts and bolt assembliesShop and site weldsLine cuts, polygon cuts and part cutsFittings, chamfers and edge chamfersAssemblies and sub-assembliesMain part and secondary part rules
Connections and ComponentsUsing the Applications and components catalogBase plate and anchor bolt connectionsEnd plate and clip angle connectionsGusset and bracing connectionsSplice and stiffener detailsSaving custom component settings
Model Checking and NumberingClash check and resolving clashesInquire tools and model checksNumbering series and settingsAssembly and part position marksRevision control and change management
General Arrangement DrawingsDrawing types and the Document managerCreating GA drawings from viewsDrawing properties and layoutsGrid dimensions and member marksSection views and detail viewsAnnotation and title blocks
Assembly and Single-Part DrawingsCreating assembly drawings automaticallySingle-part drawings for fabricationDimensioning rules and editing dimensionsBolt, weld and part marksCloning drawings and updating after changes
Reports, NC Files and InteroperabilityBill of material, bolt list and assembly list reportsExporting reports to ExcelNC (DSTV) files for CNC fabricationIFC export and importReference models from other BIM softwarePrinting drawings to PDF and DWG
Steel Detailing ProjectProject brief: industrial steel shed or mezzanine structureComplete 3D model with connectionsNumbering and clash checkGA, assembly and single-part drawing setReports and IFC for final submission
Getting Started with AutoCADAutoCAD interface, ribbon and workspacesDrawing units, limits and templatesCoordinate systems: absolute, relative and polarOpening, saving and managing drawing files (.dwg)
Drawing and Precision ToolsLINE, CIRCLE, ARC, RECTANGLE and POLYGONPolylines, splines and ellipsesObject snaps, polar tracking and object snap trackingDynamic input and drafting settings
Modifying ObjectsMOVE, COPY, ROTATE, SCALE and MIRROROFFSET, TRIM, EXTEND, FILLET and CHAMFERRectangular, polar and path arraysGrips, selection methods and object properties
Layers and Drawing OrganisationCreating and managing layersLinetypes, lineweights and coloursLayer states and layer filtersDesign Center and tool palettes
Annotation: Text, Dimensions and TablesText styles, single-line and multiline textDimension styles and dimensioning commandsLeaders, multileaders and tolerancesTables and fields
Hatching, Blocks and AttributesHatch and gradient patternsCreating and inserting blocksDynamic blocksAttributes and extracting block data
References and CollaborationExternal references (Xrefs)Attaching images and PDF underlaysSheet Set Manager basicseTransmit and sharing drawings
Layouts, Viewports and PlottingModel space and paper spaceLayouts, title blocks and viewportsAnnotative scalingPage setup, plot styles and PDF output
Isometric and Parametric DrawingIsometric draftingGeometric constraintsDimensional constraints and parameters
3D Modelling3D workspace, UCS and viewsSolid primitives, EXTRUDE, REVOLVE, SWEEP and LOFTBoolean operations: UNION, SUBTRACT and INTERSECTEditing solids, surfaces and meshes
3D Drawings, Visualisation and RenderingVisual styles and section planes2D drawings from 3D models (views)Materials, lights and rendering
Productivity and Final ProjectCAD standards, templates and drawing checksCustomising the interface and shortcutsFinal project: a complete 2D and 3D drawing setCourse review and practice test
Which Building Information Modeling (BIM) courses can I join?
CADD Training Centre offers 1 Building Information Modeling (BIM) course at Professional level: Professional Course in CAD Drafting & Documentation for BIM.
Which software will I learn in Building Information Modeling (BIM)?
STAAD RCDC FE, AutoCAD Professional (2D+3D), AutoCAD MEP, Revit, Revit Architecture Professional, Revit Structure, Revit MEP, Autodesk BIM 360 Design, Dynamo Studio, Navisworks, 3ds Max, Enscape for Revit, Scan To BIM, STAAD Pro CONNECT Edition…
How long are the Building Information Modeling (BIM) courses?
From 120 Hours for a short course; every course page lists its software and duration.
Can I learn Building Information Modeling (BIM) online?
Yes. Live online batches are open now (AutoCAD Professional (2D+3D+PT) Course) -- instructor-led classes in the CADD app with recordings.
Will I get a certificate?
Yes. After the course exam you get a CADD Training Centre certificate that anyone can verify online.

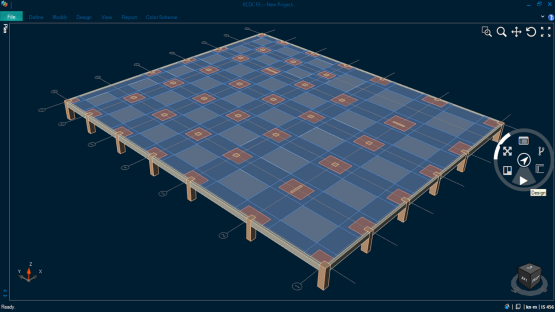 STAAD RCDC FE
 AutoCAD Professional (2D+3D)
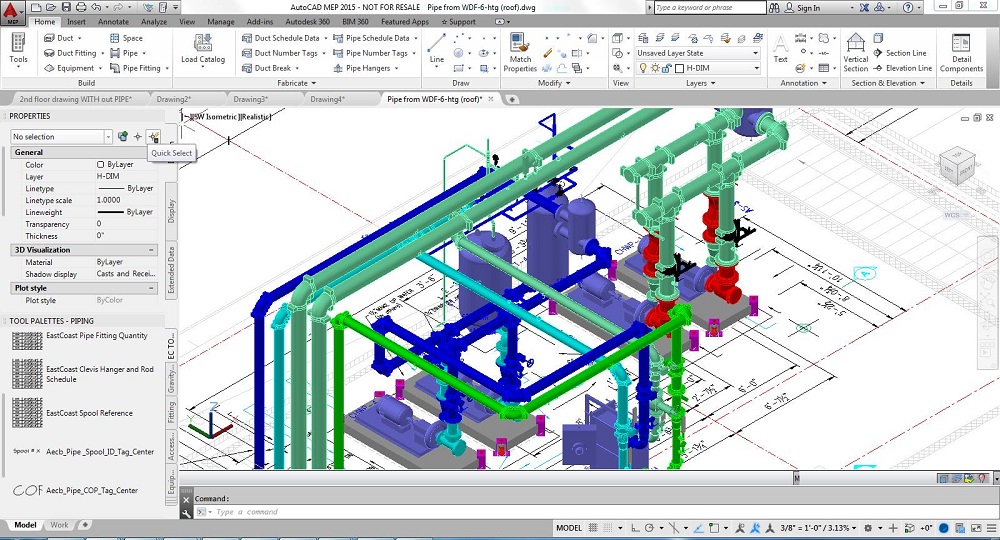 AutoCAD MEP
 Revit
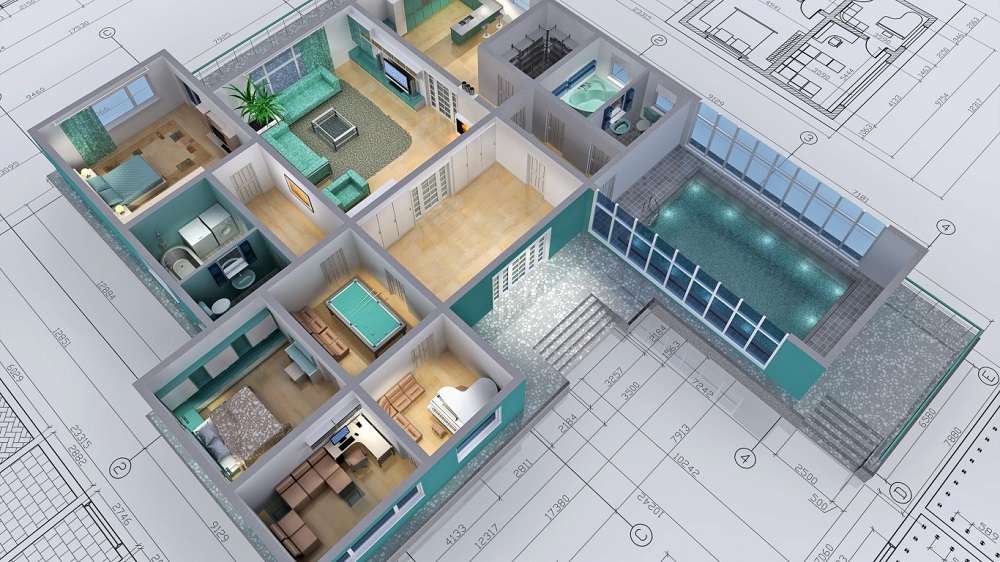 Revit Architecture Professional
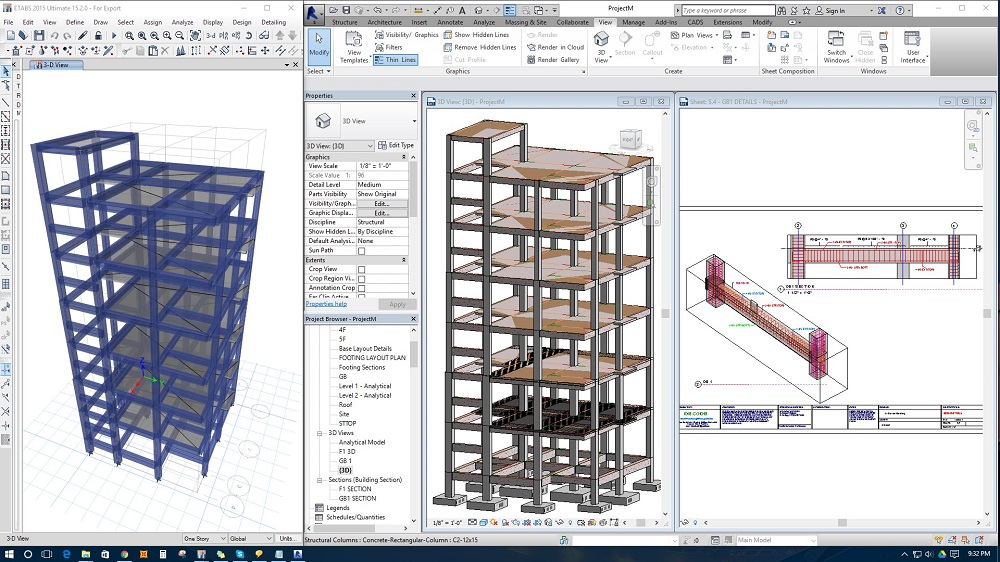 Revit Structure
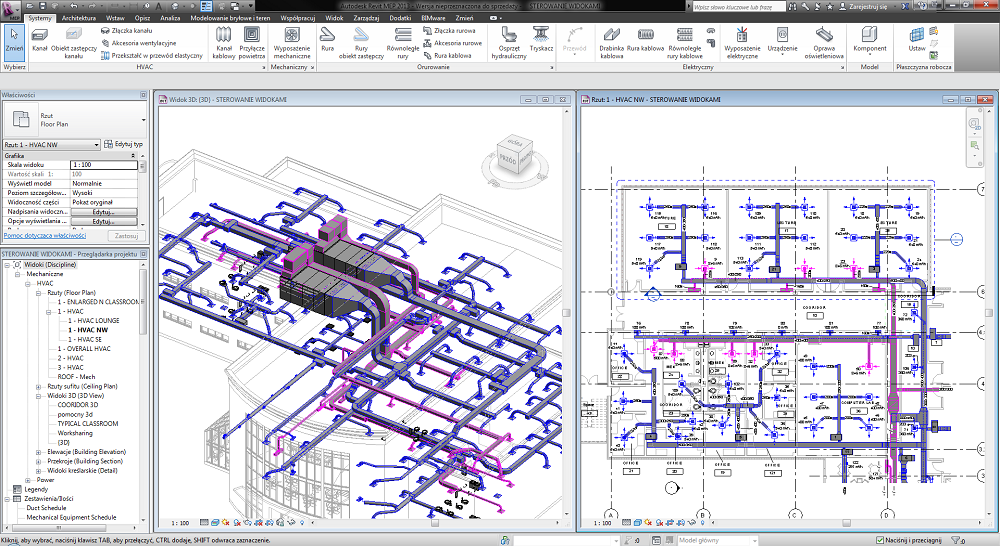 Revit MEP
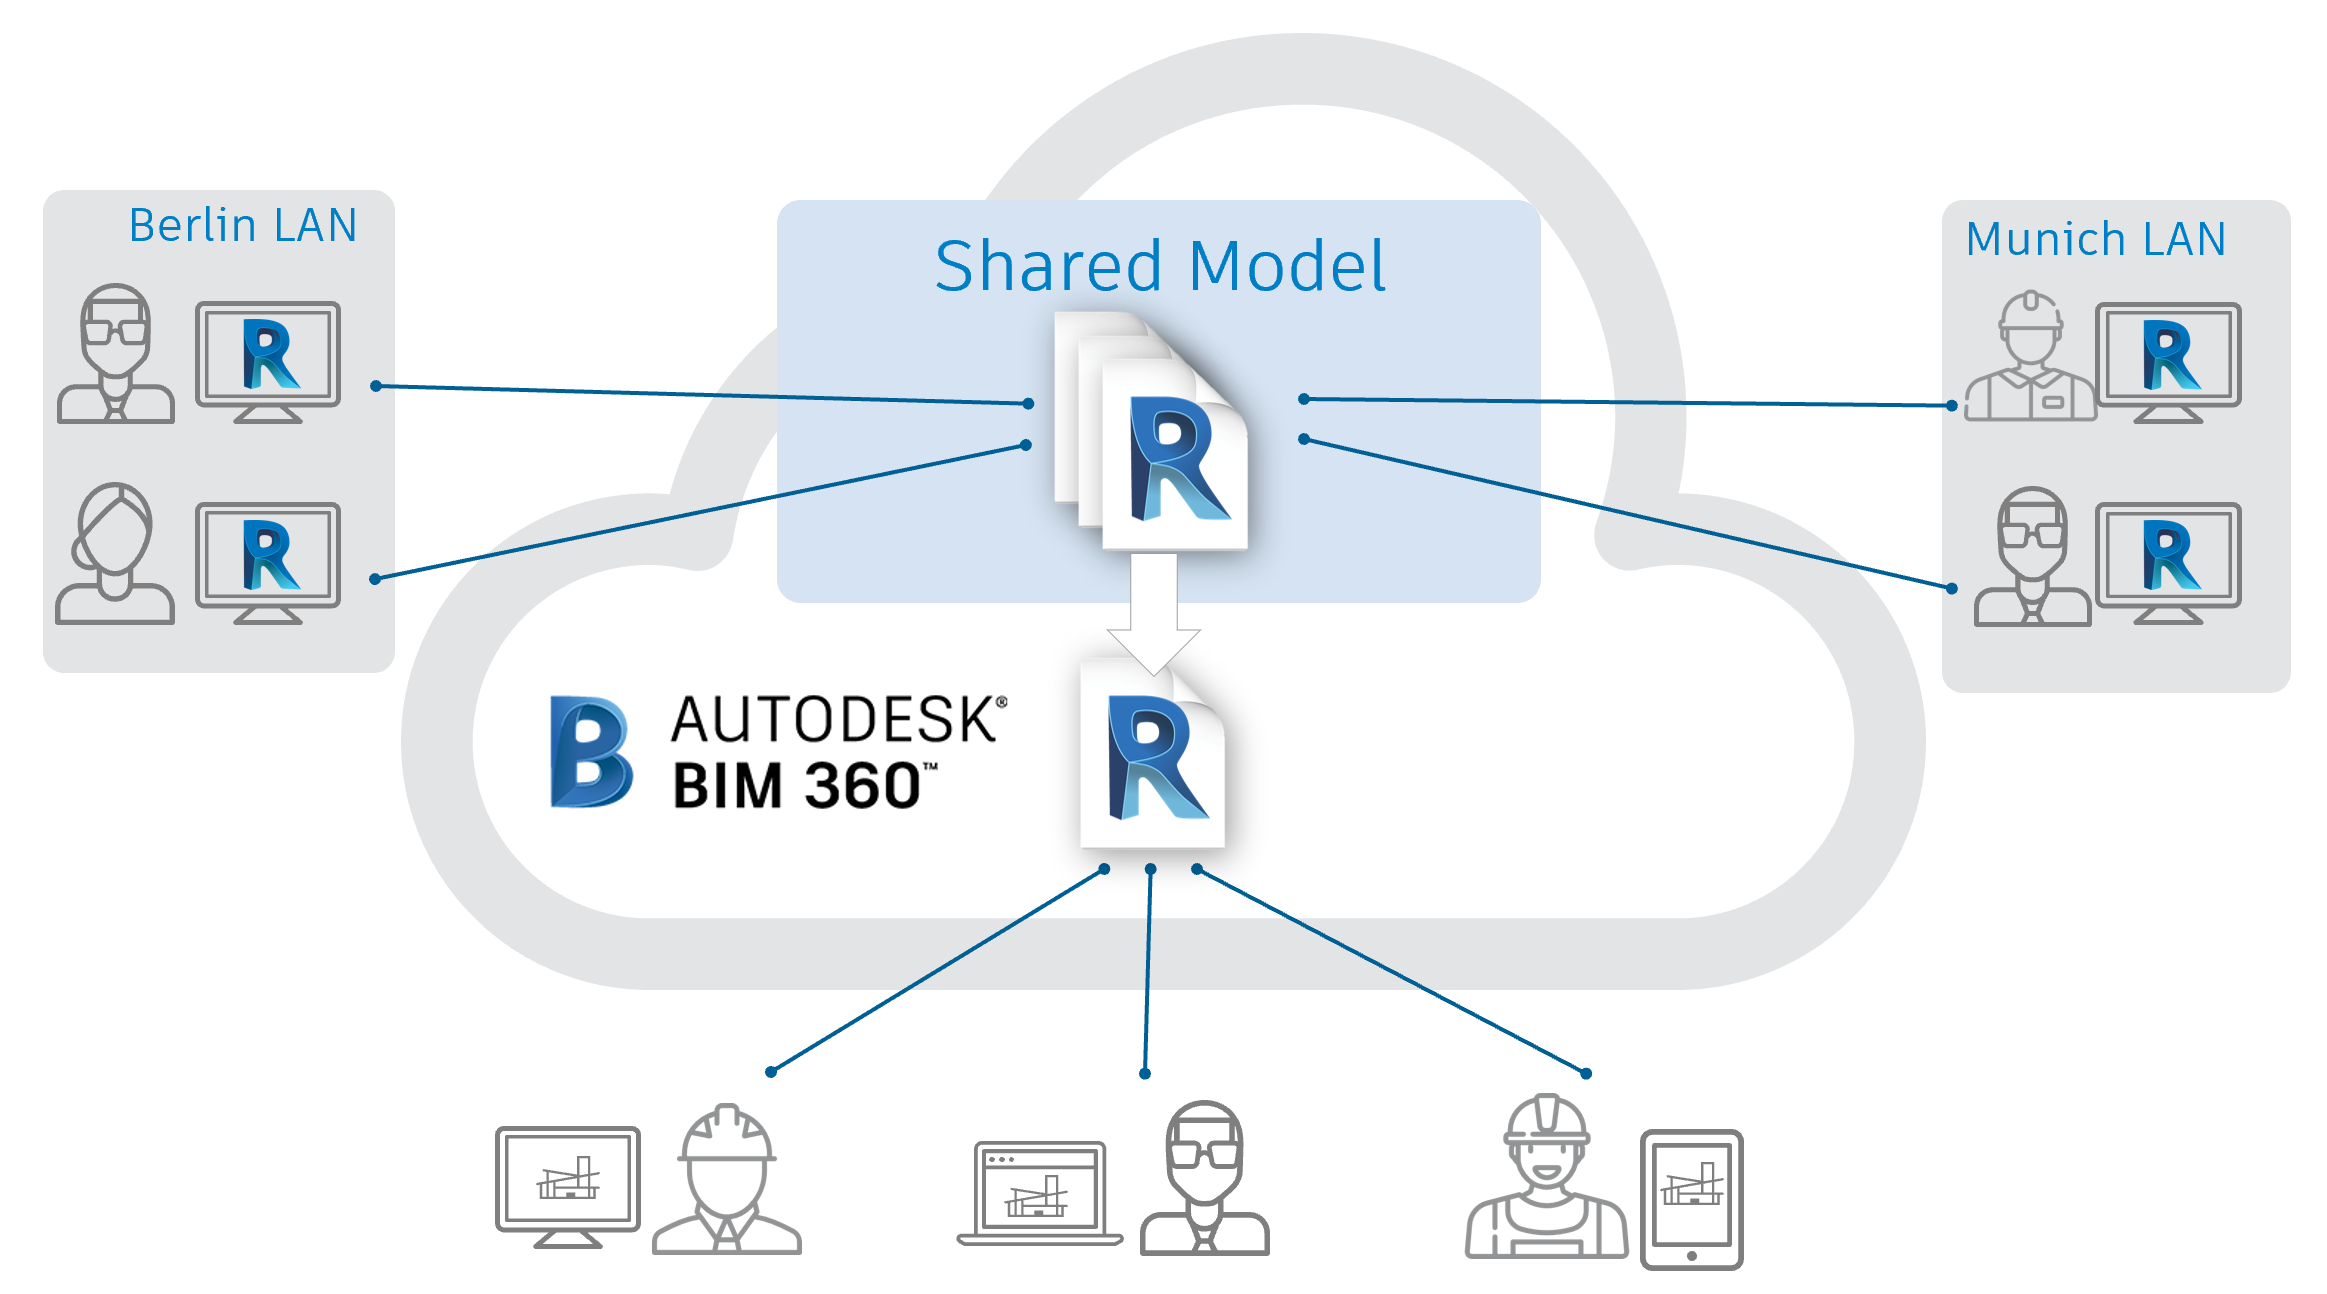 Autodesk BIM 360 Design
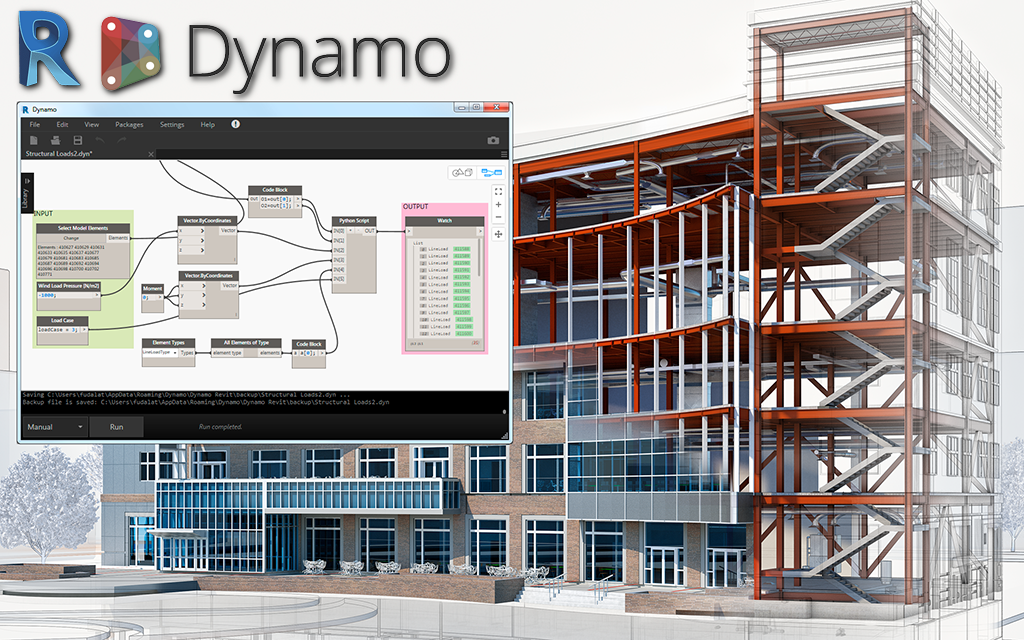 Dynamo Studio
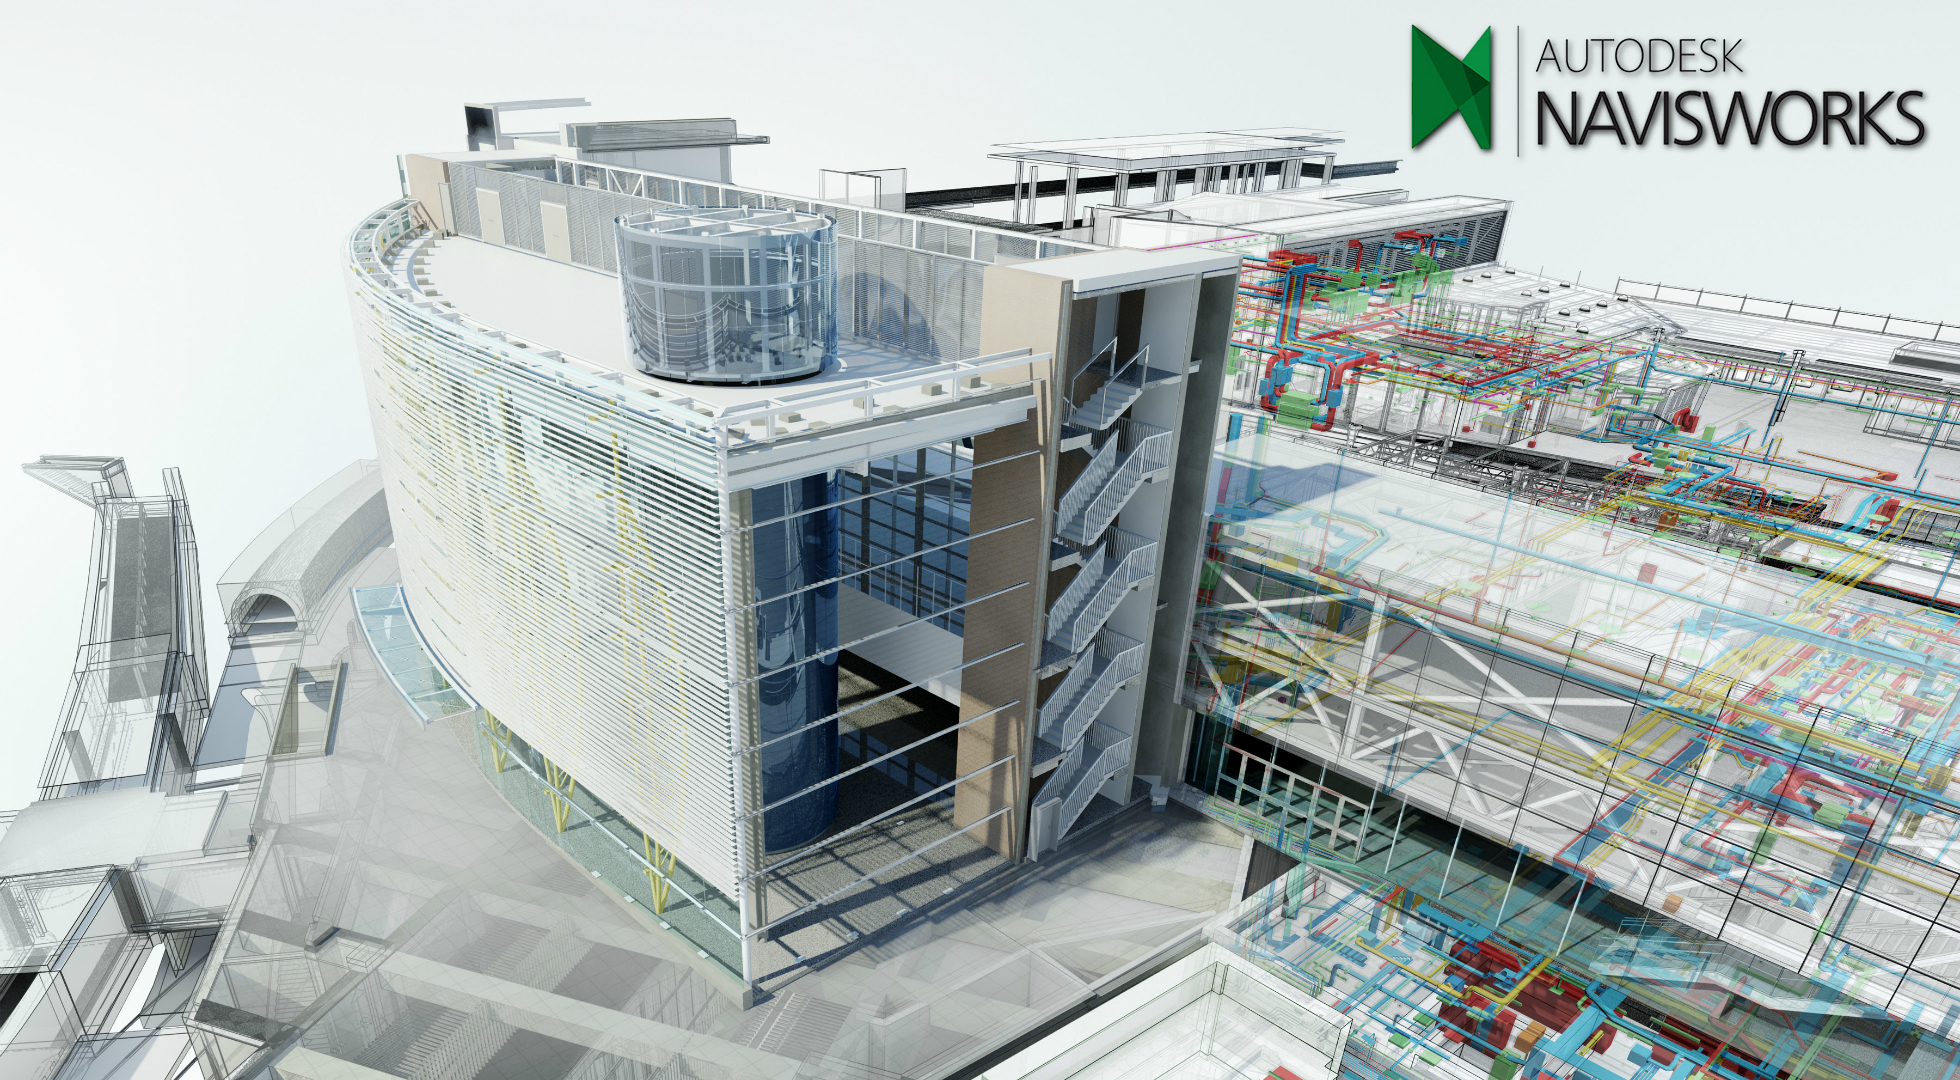 Navisworks
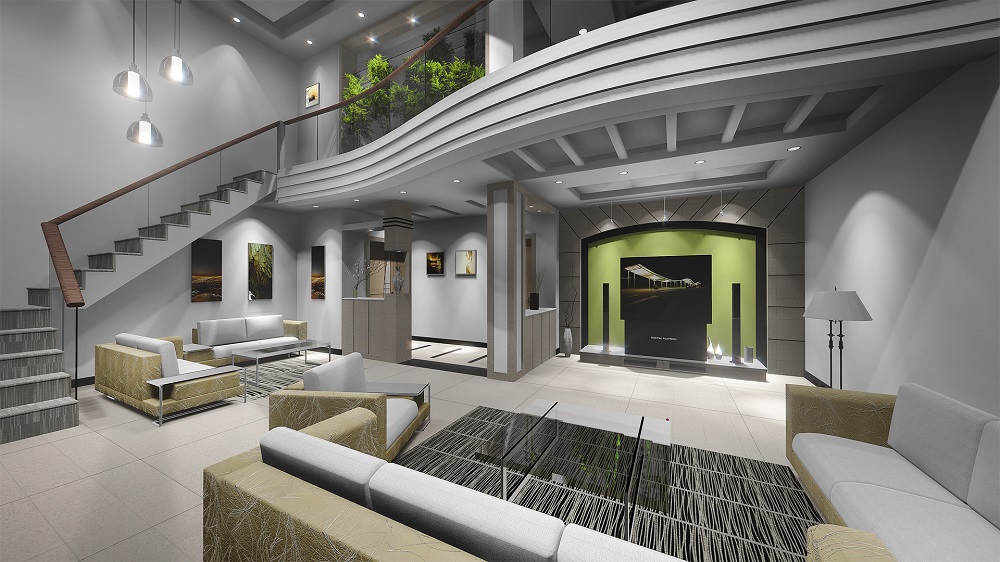 3ds Max
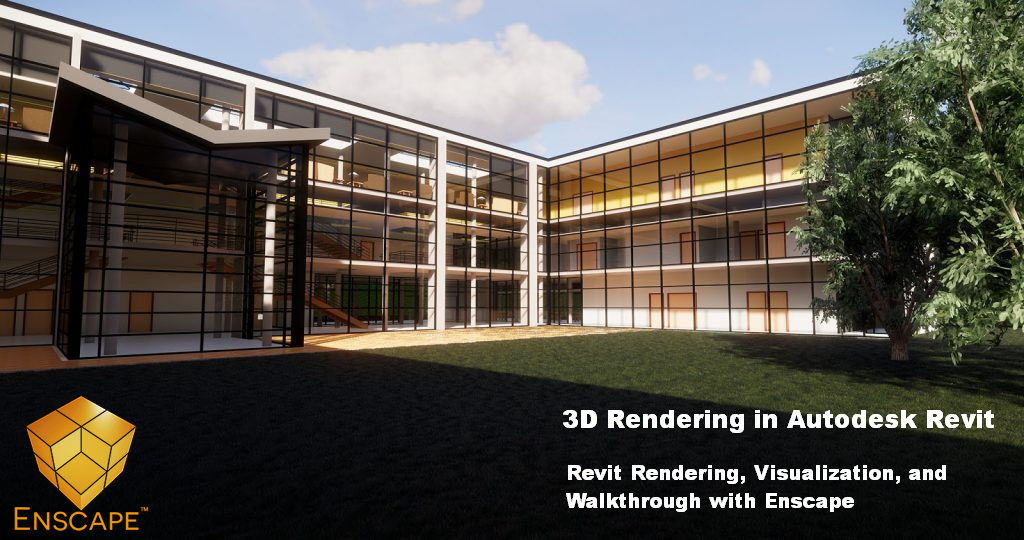 Enscape for Revit
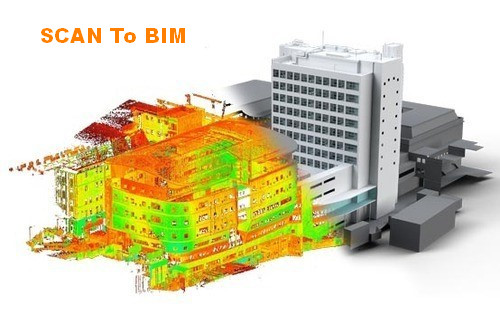 Scan To BIM
 STAAD Pro CONNECT Edition
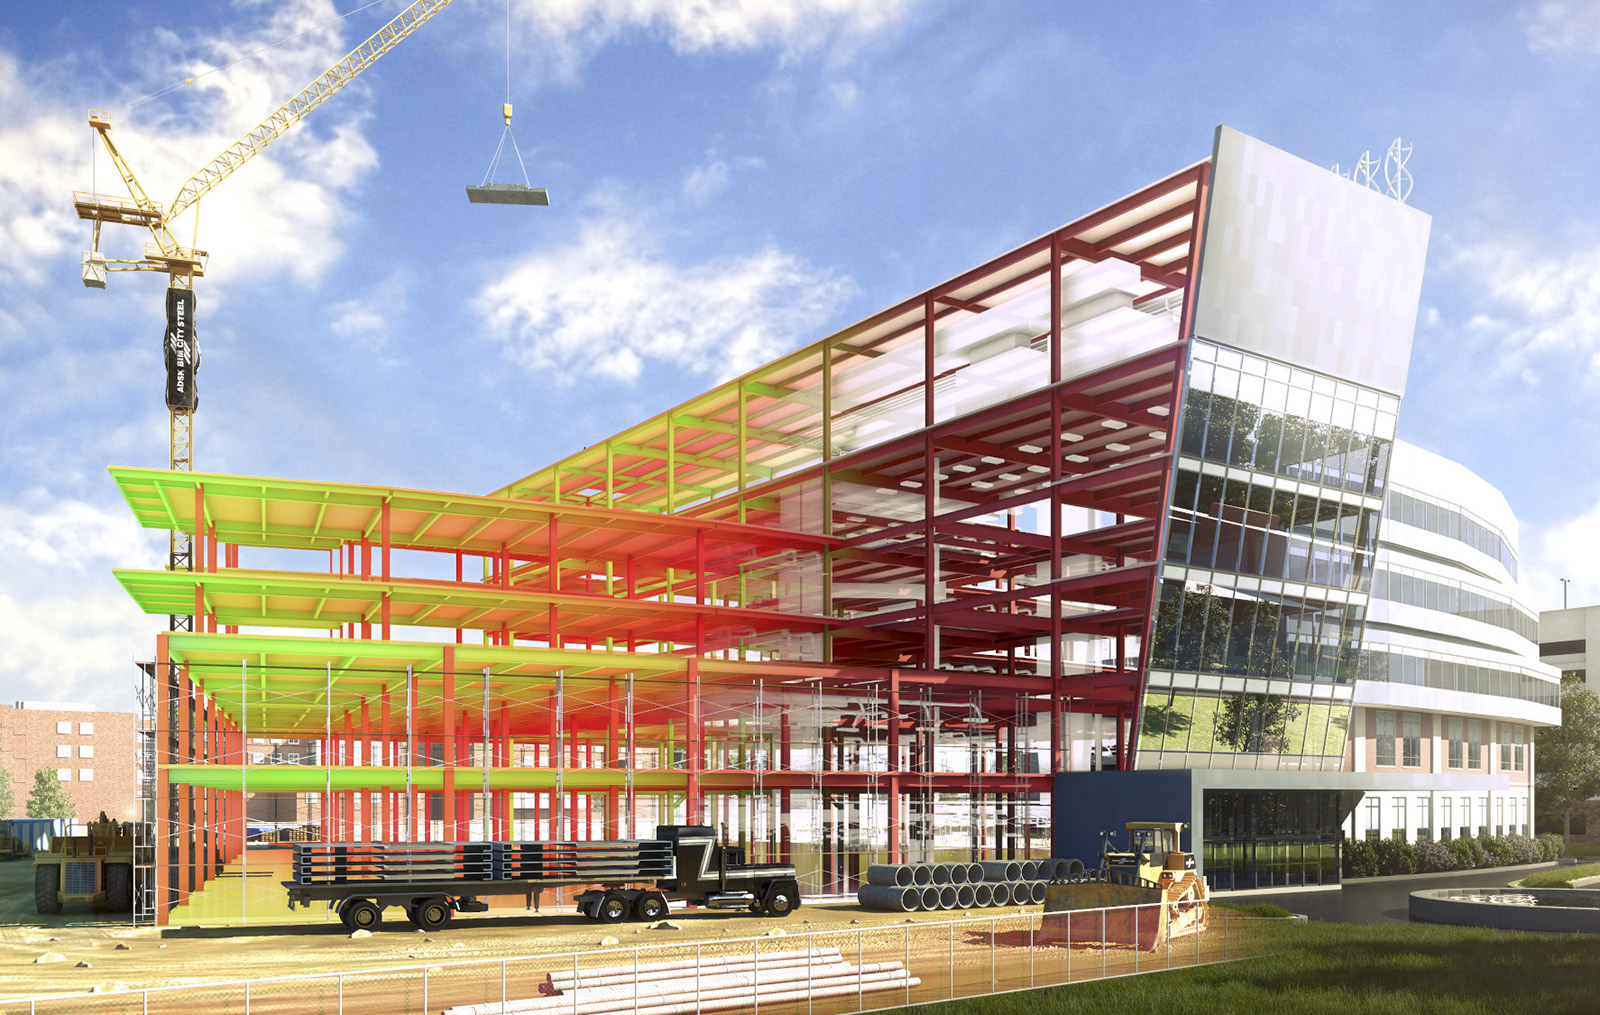 STAAD Pro Advanced CONNECT Edition
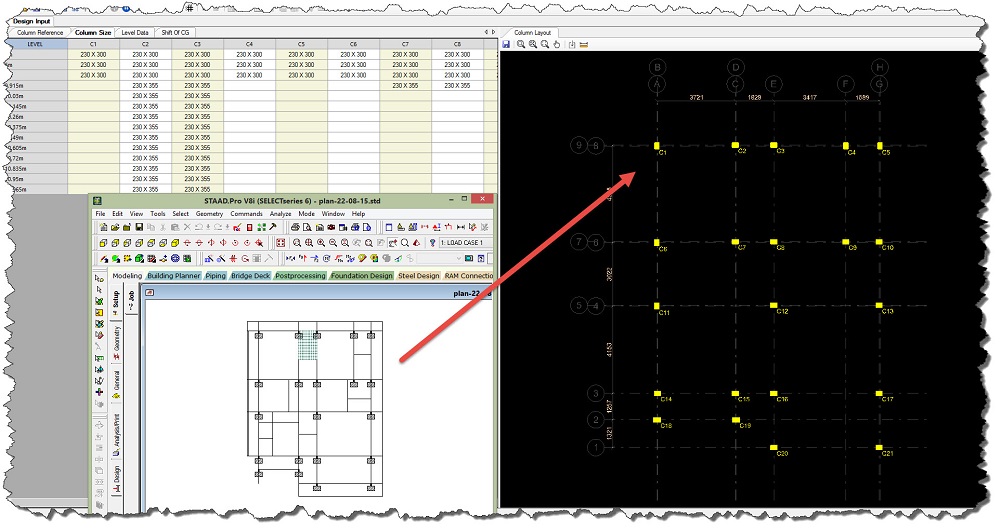 STAAD RCDC
 Microsoft Project
 Primavera P6
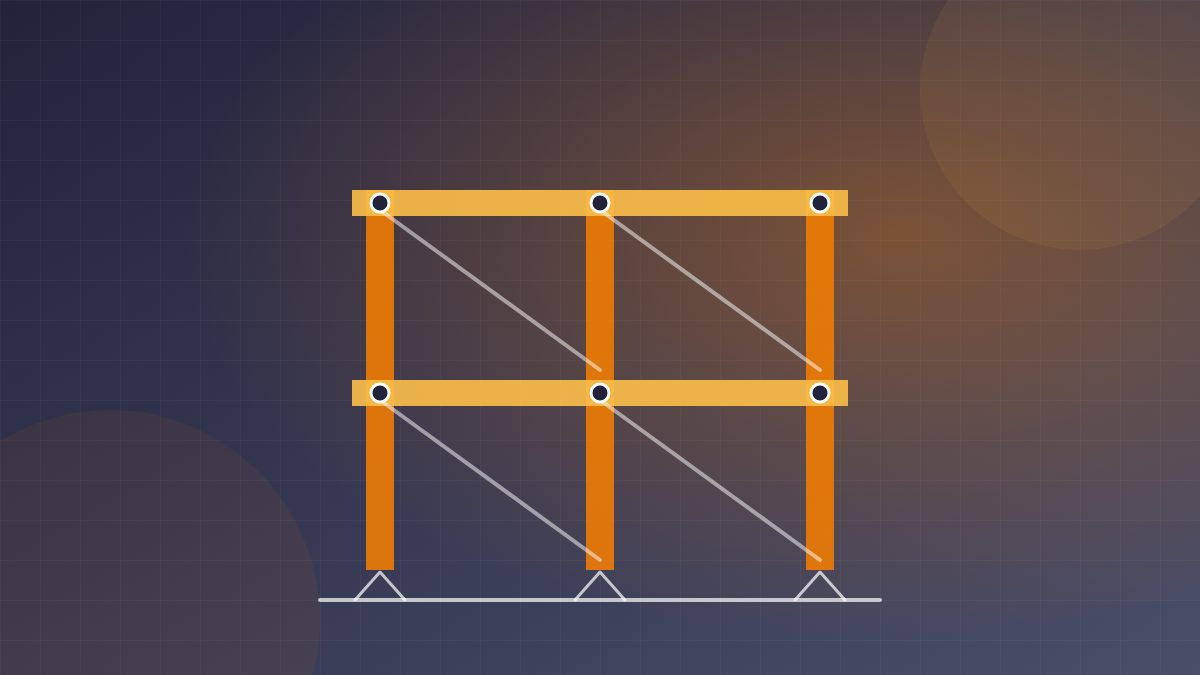 Tekla Structures
_010624043919987427.png) AutoCAD Master